Our Blog
2 Simple Ways To Add Google Analytics In WordPress

Running a website has not remained a simple task in today’s intensely competitive world. You need to create a powerful interface and execute effective marketing strategies in order to appear in front of the target audience. The problem is your competitors are thinking along the same lines and making similar efforts. You need tools that can help in assessing your website’s performance and knowing how people are using it. Google Analytics is one such helpful service that provides valuable insight into website traffic. Here we are discussing 2 quick ways to add Google Analytics in WordPress websites. This will allow website owners to analyze their traffic and make accurate data-driven decisions.
One of the most attractive features of WordPress is its flexibility. You can do the same task in multiple ways depending upon your technical proficiency. In this tutorial, we are providing you two methods to integrate your interface with Google’s helpful service. The first method is for non-technical users who do not have in-depth coding knowledge. The second process if for people who are confident enough to modify their website’s code. Developers or people involved in WordPress customization services will like the latter while beginners will prefer the first one.
1. Adding Google Analytics To WordPress With A Plugin
Let’s first take a look at how the process can be conducted with the help of a plugin. The following steps will help in completing the procedure:
i) Sign Up With Google Analytics
Before integrating the service with your interface, you will have to sign up with it. This can be done by visiting its website. In case, you have a Google account you can complete this step easily. Even if you do not have one, you can create any Google service like Gmail account and then use it to access Analytics. Click on the Sign up button and then on the next page choose an Account name.
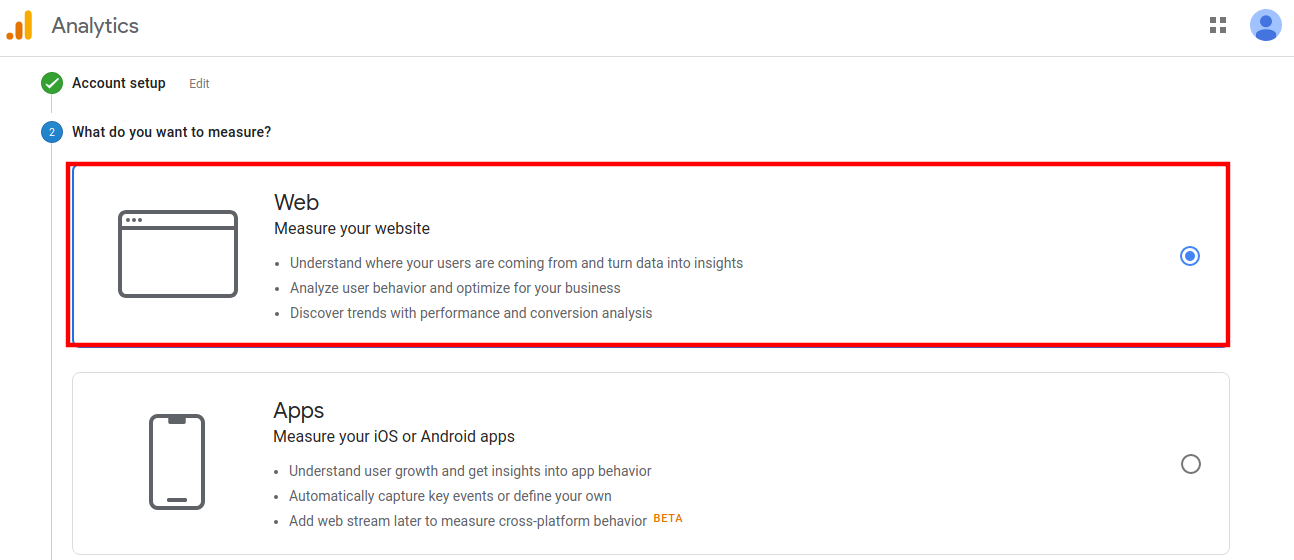
You will now be directed to the next step in the signing-up process which is to choose which property you want to track. Here you must select the option to Measure your website.
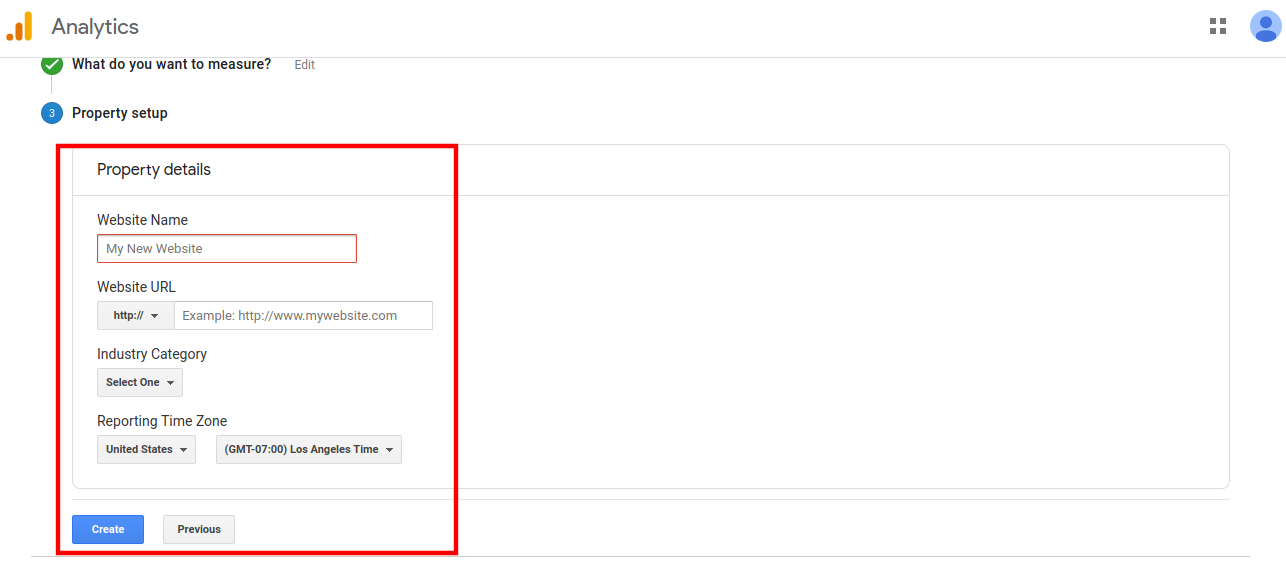
Press the Next tab and go to the Property setup screen. Here you will be asked to provide your website’s name and URL. you will also have to choose its industry category and your preferred reporting time zone.
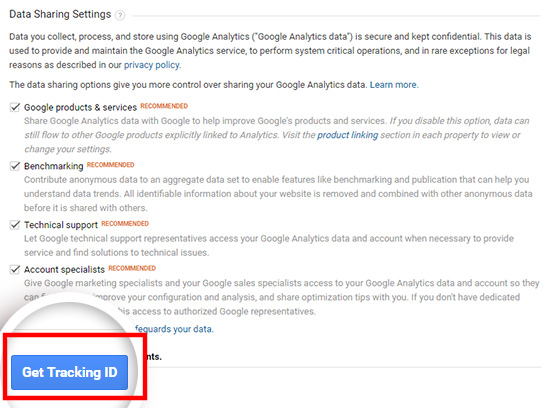
After providing all the details, hit the Get Tracking ID tab. A popup will appear where you will have to accept the terms of service. Once you do so, your signing-up process is complete.
ii) Install The MonsterInsights Plugin
The data that Google Analytics provides is extensive and it can be complex for beginners to analyze it according to their requirements. There are various plugins that help you in easily breaking up the information and generate reports according to your specifications. The MonsterInsights plugin is one such handy tool. It is a freemium product meaning it is available in free as well as paid variants. Here we are using the open-source version.
Log in to your admin dashboard and go to Plugins > Add New. Search for the plugin and then install it. Do not forget to activate the tool before proceeding ahead.
iii) Complete Setup To Connect
As soon as the plugin is activated, its setup wizard will be initiated. First, you will have to select a category for your interface. Press the Save and continue tab after making the selection.
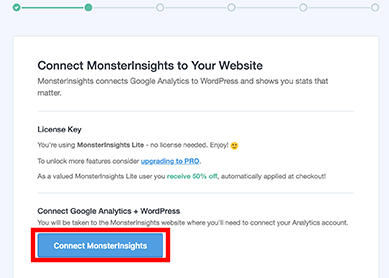
On the next screen, press the Connect MonsterInsights tab.
A popup will appear asking you to choose a Google account. Select the one which you used to sign up in Step i. The plugin will now ask your permission to access the account. Press Allow and then choose the website which you want to track. Hit the Complete authentication button.
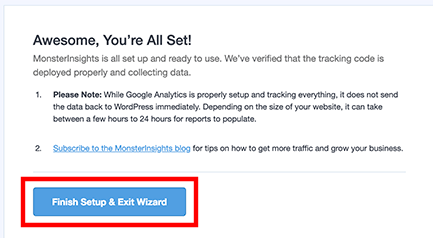
The process to add Google Analytics in WordPress is now complete. You can press Save and continue to skip some extra steps. Finally, close the wizard by clicking Finish Setup and Exit Wizard.
2. Manually Adding Google Analytics To WordPress
Following is the process to manually add Google Analytics to your interface:
i) Generate The Google Analytics Tracking Code
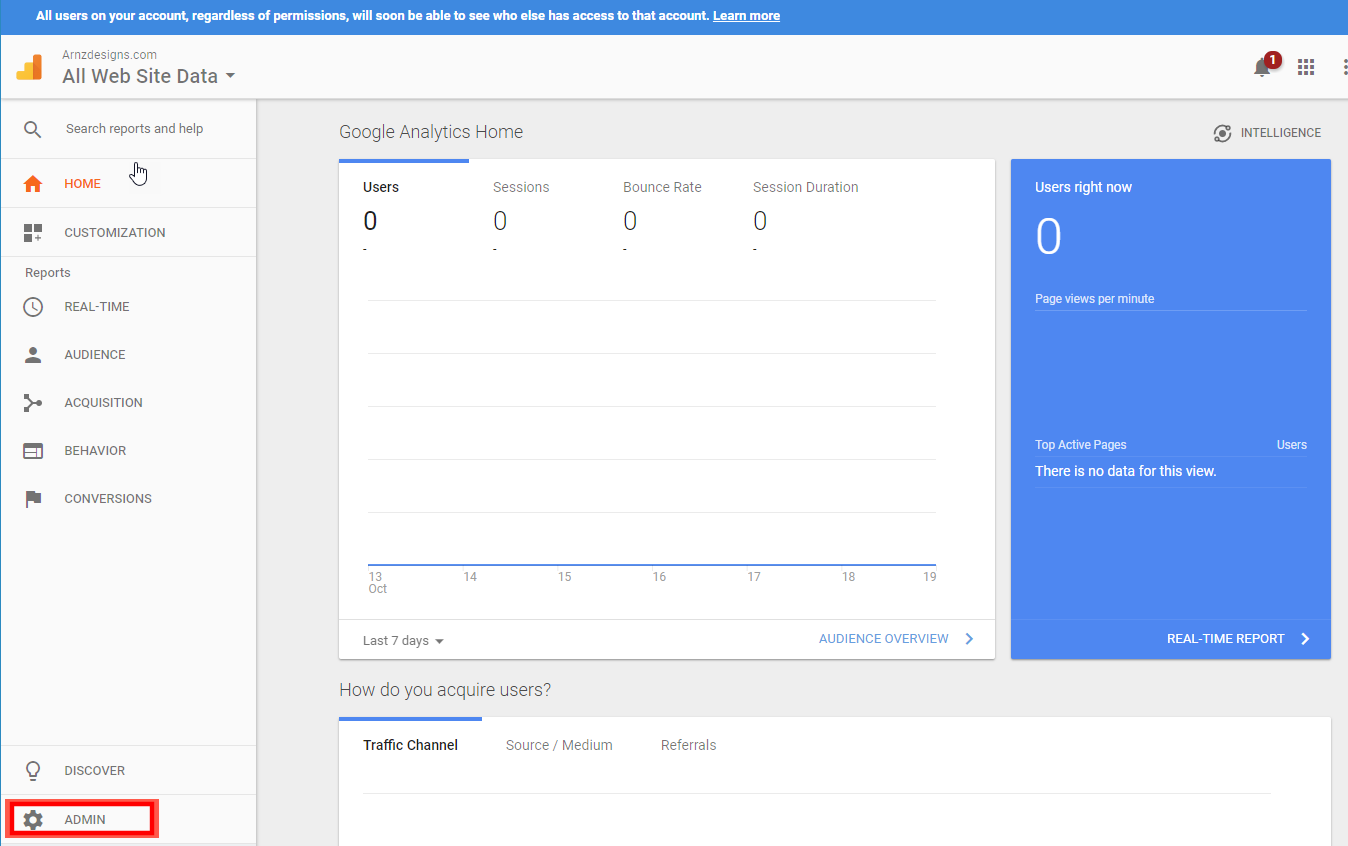
We will need to add the tracking code manually to our website. First, we will need to generate the key from our account. Access your Analytics profile and then select the website which you want to monitor. Now, in the left-hand panel scroll down to locate and click the Admin option with the gear icon.
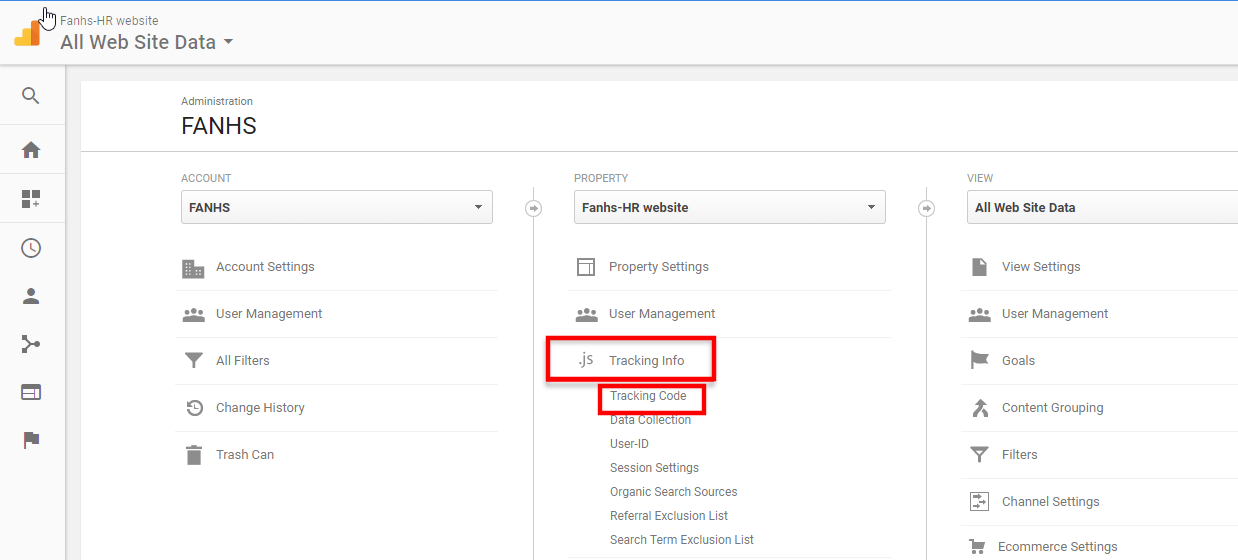
Now in the property column in the middle, select Tracking Info and then click on Tracking Code.
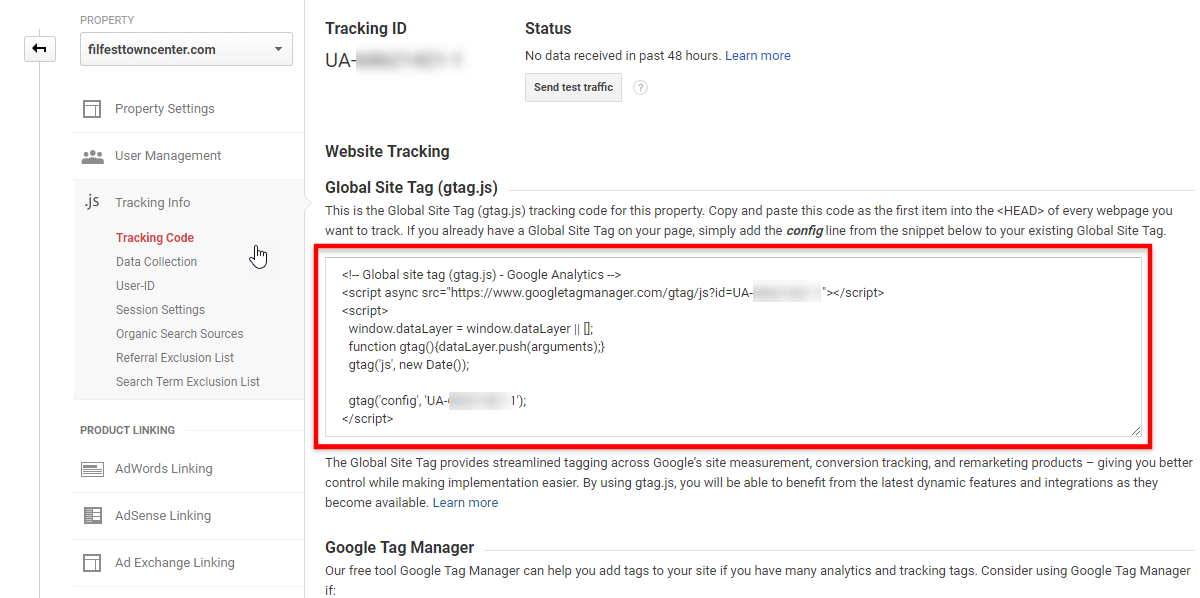
You can now access the code in the Website Tracking section. Copy this code and move to the next step.
ii) Add The Tracking Code To Your Website
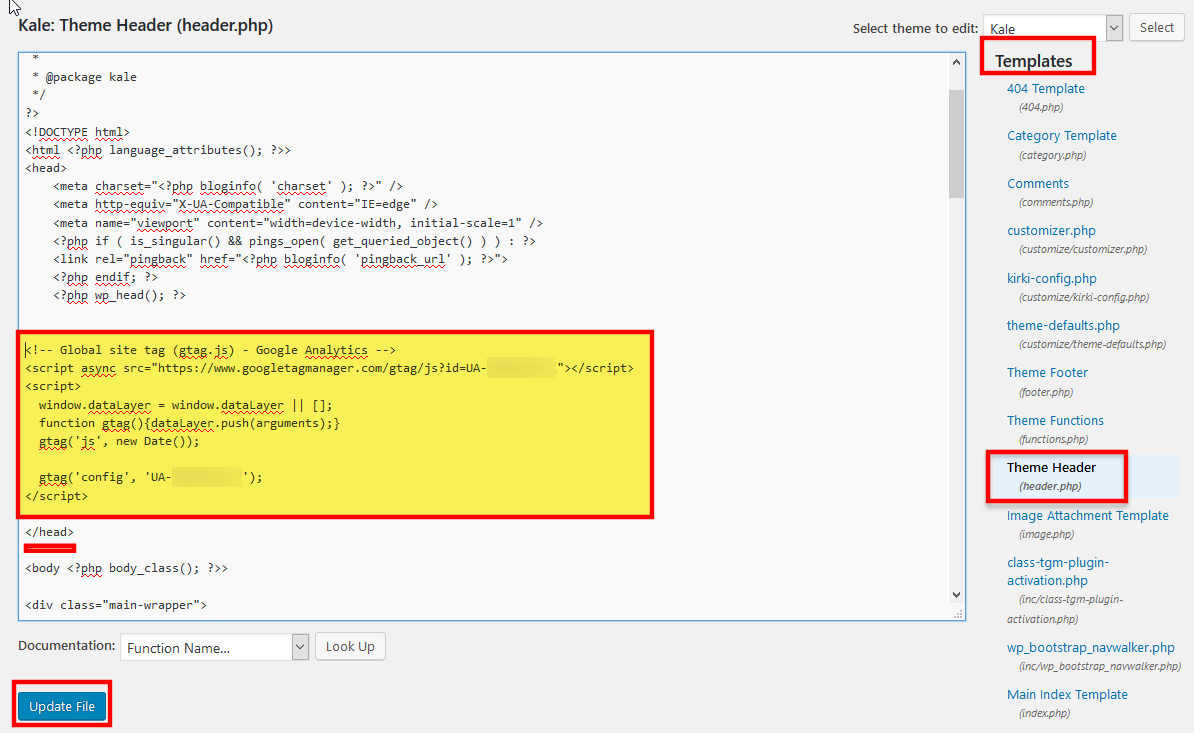
Go to the dashboard of your WordPress installation and click on Appearance in the menu. Select Editor in the panel on the right-hand side and then click on the Theme Header option to open the header.php file. Now add the code that you copied in the previous step into the header.php file as shown in the image given below.
Remember the code must be inserted before the closing tag. Press the Update File tab to conclude the process.
Conclusion
You can choose any of the two methods mentioned here to integrate Google Analytics with your website. If you are a beginner, it will be pertinent to consult a WordPress expert to know the essential dimensions to track for efficiently tracking your interface.

