Our Blog
2 Easy Ways To Add Clickable Call Button In WordPress
A website is not a simple repository of information about the entity it represents. Modern-day interfaces are vital tools in fulfilling key marketing and business goals. In today’s digital world driven by smart devices, it is essential that your interface contains mobile-friendly features. One such element that can have a significant impact on your conversion rate is a click to call link. This will enable mobile users to get in touch with your business in just a single tap. In this tutorial, we will discuss the methods to add clickable call button in WordPress websites. More and more people are using handheld devices to surf the internet. This has led to an increase in the number of mobile searches. In case, you provide your mobile visitors with a facility to call you without leaving the website, it will definitely increase your conversions.let’s see how the feature can be added to a WordPress website.
1. Manually Adding The Clickable Call Button
The feature can be integrated manually by using HTML. Take a hyperlink and then wrap the telephone number in the tel: schema. The code given below shows how it must be done:
< a href=”tel:+1-123-456-7890″>Call Now!</a>
Remember to replace the phone number with your contact number and the “Call Now” text with your custom message. This is all you need to add a clickable call link to your interface. Let’s see how you can add a click to call button with this method. You can use the following code:
<a class=”call-button” href=”tel:+1-123-456-7890″>Call Now!</a>
Use the WordPress customizer to add some custom CSS to create the button:
.call-button {
color: #fff !important;
background: #0ba9d5;
padding: 20px;
border-radius: 5px;
display: inline-block;
border: none;
}
There is one problem in this method. The button will be visible on the desktop version of the interface. In order to prevent this, you can use CSS media queries. The following code will not show the tab on screens with sizes exceeding 600px width:
@media only screen and (min-width: 600px) {
.call-button {
display: none;
}
}
In case, you possess technical knowledge and are not inclined to hire a WordPress developer or use a plugin, then this method is for you.
2. Adding The Clickable Call Button Through A Plugin
The above method can be difficult to execute for people without coding knowledge. They can add the button by using a relevant plugin. The following steps will be helpful in implementing the feature through a WordPress plugin:
i. Install A Click To Call Button Plugin
You can hope to find a plugin for every conceivable functionality under the sun. We will add a clickable call button in WordPress by using a plugin made specifically for the purpose. The tool that we have chosen for this tutorial is called the Call Now Button. It is a 5-star rated product with over 100,000 active installations. It is an open-source software meaning you do not need to shell out any money for using the solution.
Access the admin dashboard of your installation and hover your cursor over the Plugins option in the menu. Choose Add New and then search for the tool. Use the above image as a reference to locate the correct option. Click on the Install tab to download the solution. Activate it and move to the next step.
ii. Activate The Button
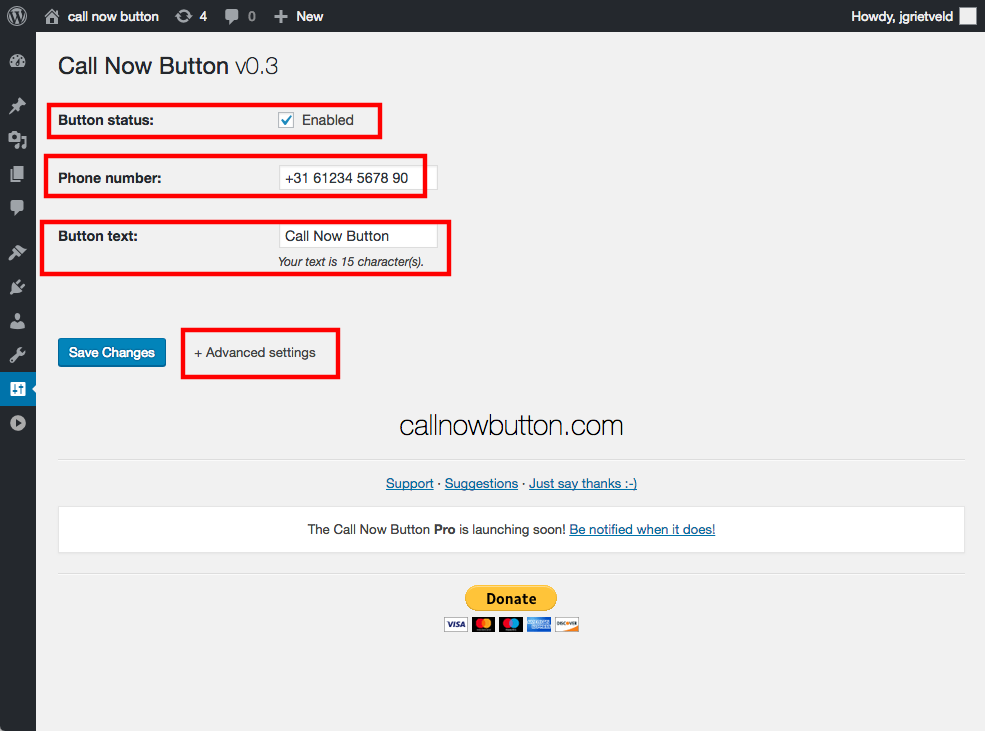
Once you have activated the tool on your website, go back to the dashboard. Locate the Settings option in the menu on the left-hand side. Under it, you will find a new option called Call Now Button. Click the link to open its settings screen. You will see an option called Button status right on top of the page. Tick the box against it to activate the button. In the next field, enter the phone number on which you want to receive the calls. You can also add a call-to-action message in the Button text field. Once you have filled the details, press the Advanced settings link.
iii. Configure The Advanced Plugin Settings
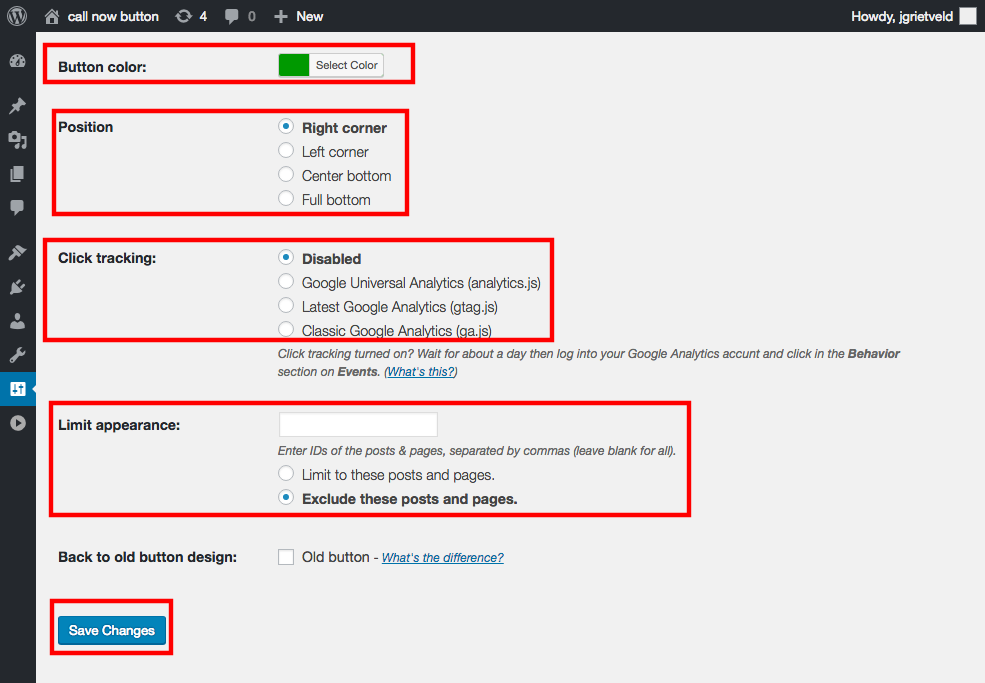
The advanced settings section of the plugin contains some useful options for defining the look and positioning of the element. The first option on the screen is called Button color. Clicking it will open a color picker. Here you can choose the exact shade of your call tab. Below it is Position with 4 different options. Users can place the button in the right or left corner of a page. They can also choose to locate it at the bottom or center bottom of the screen by turning on the relevant radio button. You can also define the posts or pages where the item will be displayed by entering their IDs in the Limit appearance field. Then you must choose the Limit to these posts and pages. You can also adopt the reverse approach and enter the IDs of posts/pages on which you do not want to show the tab. The plugin also allows users to monitor their conversions by activating Google Analytics tracking in the Click tracking section. You will need to have the analytics service enabled on your interface in order to use this feature. Press the save changes button after completing the configurations. The clickable button will now be visible to your mobile visitors.
Conclusion
You can choose either of the methods explained here, depending on your expertise, to integrate a clickable call button in your interface. People who still feel they need assistance must engage professional WordPress website development services for doing the job.