Our Blog
2 Quick Ways To Add Content Lockers To WordPress Websites

Do you know how to add content lockers to WordPress websites? Learning this simple trick can boost the conversions of your interface. A lot of people convert HTML CSS to WordPress or switch platforms to start content-intensive websites. The open source CMS is an ideal platform for this purpose as it enables easy management of large content volumes. Locking content means restricting access to specific material unless the user takes a certain unlocking action. You would have seen this tactic in action on websites wherein you are asked to perform an action to access content like e-books or free guides. This strategy helps in generating new leads for your business.
Before we discuss the method to integrate the feature on your website, let’s know about unlocking actions. The most popular one is to share the matter on social media. Outlets only those visitors access the content who share it on specific social platforms. Another well-known unlocking method is opting in for an e-mail list. Websites routinely ask users to subscribe to their e-mail newsletter service in return for access to valuable information.
Let’s see how WordPress users can activate both types of content locking on their interfaces.
1. Adding A Social Locker To WordPress
In case, you are interested in activating social locking you can use the method explained here. This will help you boost your presence on social networks and enhance user engagement. Most features in WordPress can be integrated through plugins. In this tutorial, we will also explain the way to implement social locking by using a plugin.
The tool we have chosen for our guide to add content lockers to WordPress is called OnePress Social Locker. It is an open source, 4.5-star rated product. A premium version of this software is also available which contains some extra features. You can use it to encourage visitors to share your material on Facebook and Twitter.
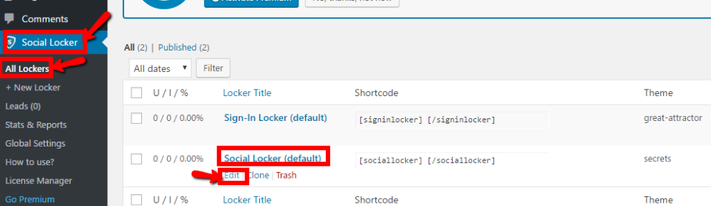
Log in to your WordPress installation through your username and password. Once you have accessed the admin dashboard, hit the link for the plugins section in the menu. Select “Add new” from the set of options which will open a new screen. Copy the name of the plugin mentioned here and paste it in the search box on this page. Locate the correct option and download its files. Activate the tool after its installation is complete. A new link called Social Locker will now be visible in the menu. Click it and go to All Lockers. Hover the cursor over the Social Locker(default) option and then click “Edit”.
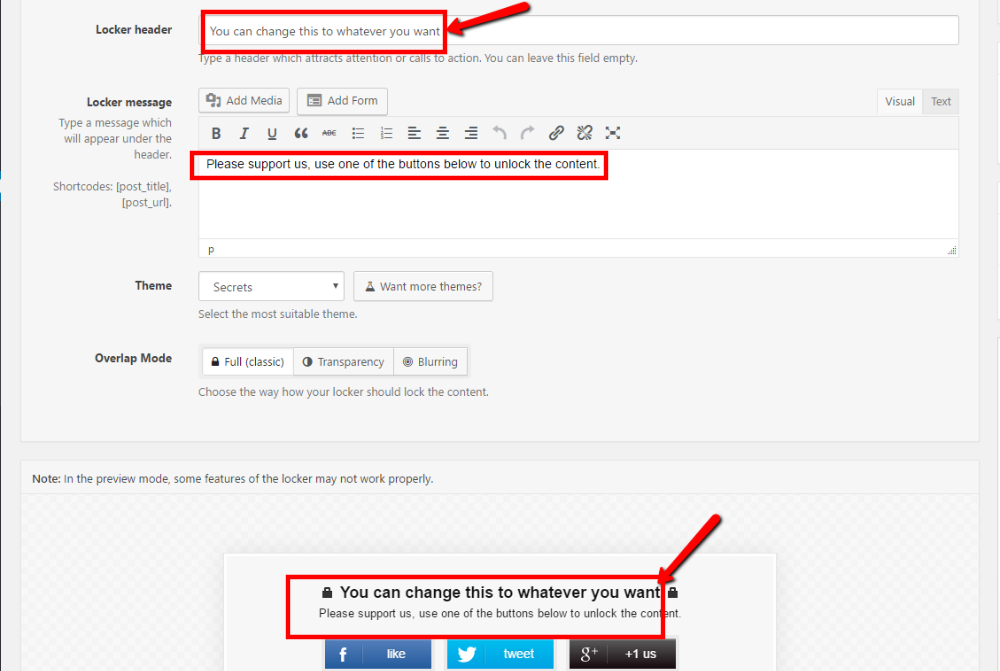
A new screen will open where you can customize the styling and message of your locking feature. As you conduct the modifications, a live preview at the bottom will reflect the changes. Save your changes and open the content you want to restrict access to in the editor.
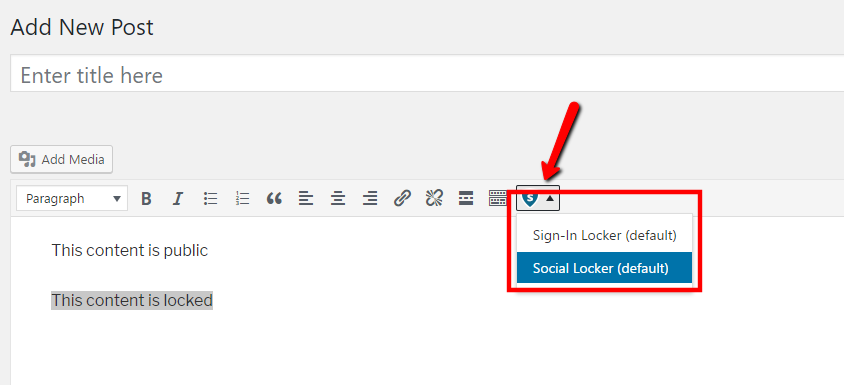
The Social Locker button will be visible in the toolbar over the editing screen. Click the button and select the Social Locker(default) option. This will wrap the chosen post in the shortcode and lock it.
2. Adding An Opt-in Locker To WordPress
This strategy of blocking content can also be used to build your e-mail subscription list. Tell your visitors that some valuable information can be accessed only if the sign up for your newsletters. An opt-in content locker can be added to WordPress interfaces through a plugin.
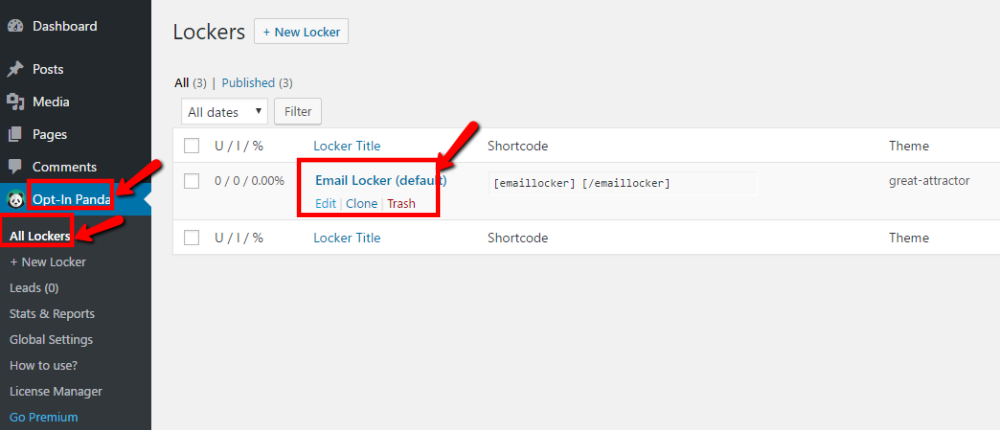
The OnePress Opt-In Panda is a useful tool which can help in growing your mailing list. Access your website’s installation and search for this tool by following the process explained in in the previous method. Install and activate the software and then head to the control panel menu. You will find a new link called Opt-In Panda. Press this link and then go to the All Lockers section. Here you will find two listed options. You will need to hover the cursor over Email Locker (default) option and customize the feature as explained in the preceding method.
Open the post to be hidden in the editor. The plugin’s button will be visible to you in the toolbar. Click on it and select the relevant option to apply the shortcode. The post will now be accessed only if the visitor opts in for the subscription.

Conclusion
These simple methods will enable you to to add content lockers to WordPress websites. The feature will help you improve your lead generation efforts and boost your social following.