Our Blog
3 Easy Ways To Change Your WordPress Theme

WordPress themes are one of the biggest conveniences offered by the world’s most popular web development platform. According to an estimate, there are more than 30,000 readymade templates available to users of the CMS. These layouts allow you to easily create a website without going through the complicated process of coding. Their easy availability also helps people in regularly modifying the appearance of their websites. Here we are discussing how you can change your WordPress theme. Most of you would already be doing the process through the admin panel but here we will tell you how the procedure can be conducted through a plugin as well as manually.
Remember to create a backup of your website before using any of the methods. Changing themes is a technical process and things can go wrong at any stage. A backup will help you in preserving your valuable content and restoring the website easily.
1. Changing Theme Through Admin Dashboard
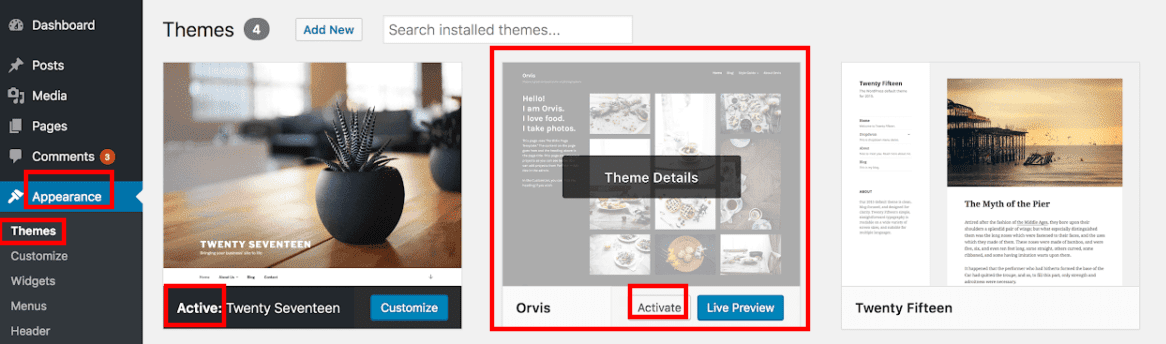
The easiest way to change your template is through the admin dashboard. Seasoned users must be well aware of the process. Here we are explaining the steps involved in the procedure for the benefit of beginners. Many people who convert HTML site to WordPress or migrate from other formats may still not be fully familiar with the CMS’s dashboard. Use your login credentials to access the admin panel. Locate Appearance in the menu on the left-hand side and then click on Themes. You will now see all the templates that are installed on your website. The layout that is presently functional on your interface will be marked as Active. Hover the cursor over the template you want to use and then press Activate. The new layout will now become active on your website.
2. Using A Plugin To Change The Theme
Switching layouts through the admin dashboard is easy but it is not always the correct approach. Changing templates on a live website is not a good practice. New users will now be wondering how they can make the switch in a non-technical and efficient manner. Such people can use a plugin to conduct the process. Let’s see how you can make the change with a plugin:
i. Install The Theme Switcha Plugin
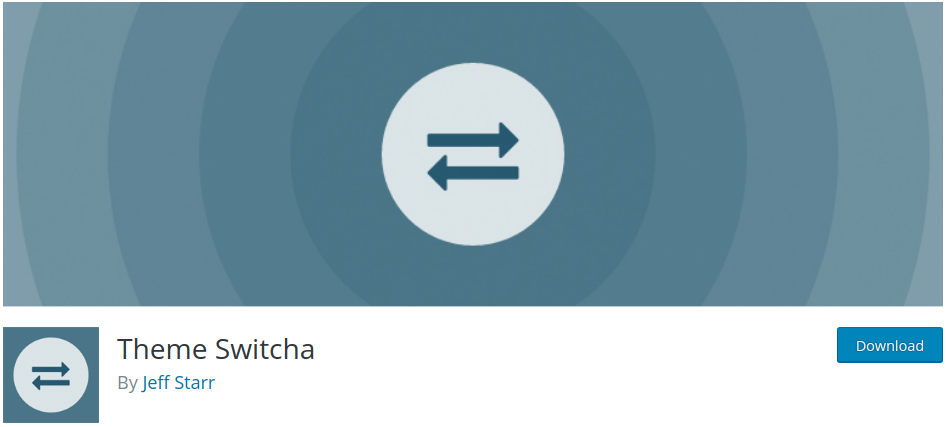
You can install the Theme Switcha plugin on your interface. It is an open-source product with a 4.5-star rating. It will allow you to modify a template and preview all the changes without making it live on your website. Go to Plugins > Add New and search for the tool. You can use the image given here to locate the correct product.
Once you locate the tool, install and activate it on your interface and proceed ahead.
ii. Change Your Theme
Go back to the dashboard and visit Settings > Theme Switcha. In the General Settings section tick the “Enable theme switching” box in the Enable switching option.

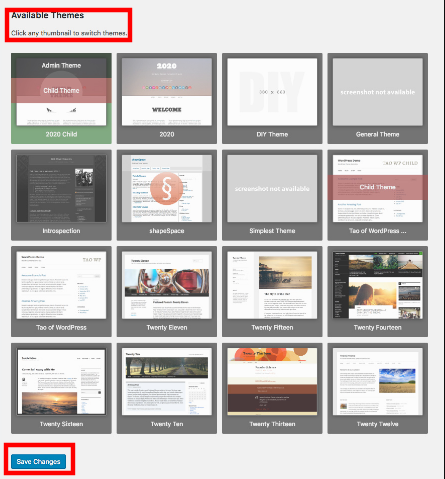
Scroll down the page to the Available Themes section. Here you will find the thumbnails of all the templates that are installed on your interface. Select anyone and preview the layout in a browser window. Then, choose the product that you want to activate and hit the Save Changes button.
3. Manually Changing Your WordPress Theme
We will now discuss how you can change your WordPress theme manually. In this method, you will have to connect to your website’s database for making the necessary modifications. Here is the step by step process.
i. Find Out The Theme Folder Name
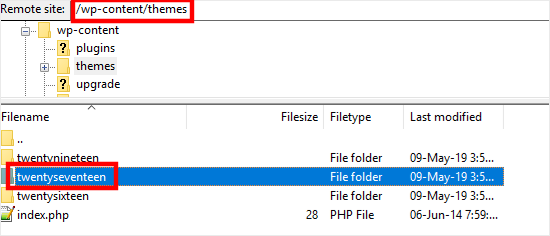
You must first know the folder name of the theme that you want to activate on your website. Use an FTP client to connect to your website. Visit /wp-content/themes/ folder where you will find folders of all the themes that are installed on your interface. Locate the folder of the theme that you want to use and note down its name.
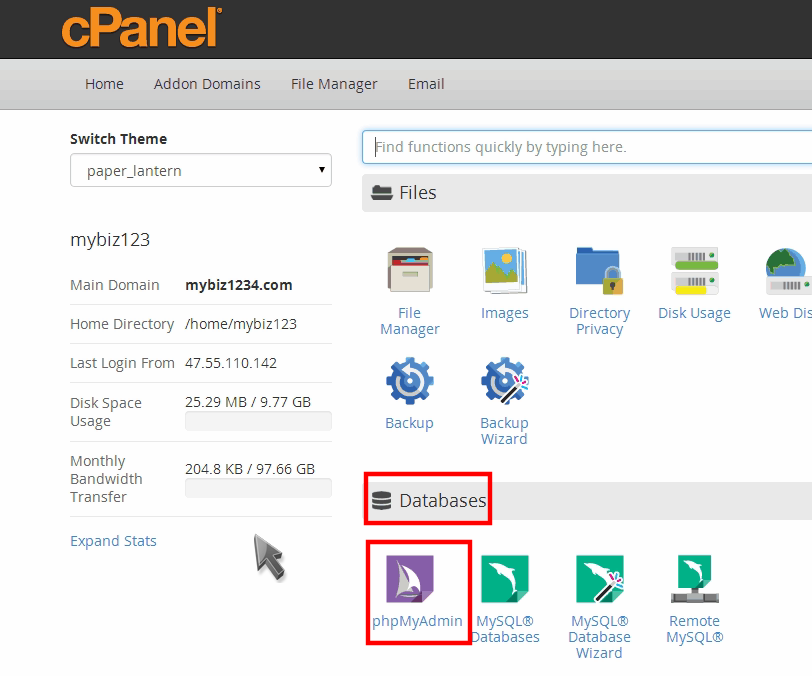
ii. Go To phpMyAdmin Through cPanel
Log in to your hosting account’s cPanel. Go to the Databases section and locate phpMyAdmin in it. Click on it to open it.
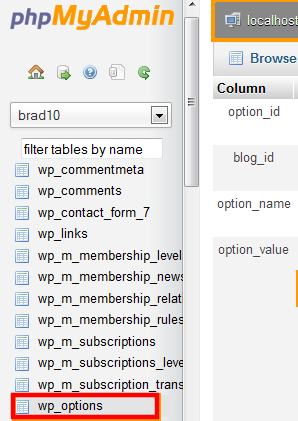
Now you will see a list of databases on the left-hand side. Locate the database of your WordPress website in it. Click your database and you will see all the tables that are included in it. Locate “wp_options” in this list. “wp_” is the prefix that is used by default for table names. However, there can be other prefixes used for such items.
iii. Make Changes In The wp_options Table
Click on the wp_options table to open it. In the main screen on the right-hand side scroll down to locate the template and stylesheet rows. Click on the Edit option at the beginning of the row.
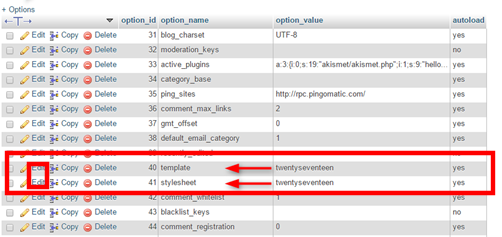
Now, enter the theme folder name that you copied in the first step in the option_value field. Press the Go button at the bottom of the screen.

Now, when you will visit your website, you will find that the new theme has replaced the old one.
Conclusion
ou can choose any of the methods explained here, depending on your technical proficiency to switch templates. In case, you feel that the process is too complex, you can contact HireWPGeeks through e-mail, contact form or phone to connect with an expert WordPress theme developer for help.