Our Blog
4 Steps To Set Up Google Tag Manager In WordPress Website

Managing a website can seem to be a complex task to beginners. The increased competition and the urgency to achieve your goals forces webmasters to use various third-party tools. Most of these solutions require the addition of tracking code to the website. This helps in integrating the service with the interface and allows the solution to provide valuable input to the user. The most common example of this kind of service is Google Analytics. In case, you are a website owner you must have integrated the Analytics tracking code into your interface to track and measure its performance. Here we are discussing how you can set up Google Tag Manager in WordPress.
People who use a variety of marketing and analytics solutions find it tedious to add a tracking tag, every time they subscribe to a new service. The tag is a piece of JavaScript which allows the external service to track your interface. Adding too many tags manually to your website’s code can cause bloating and affect its performance. The Tag Manager is an efficient tool that saves you the trouble of conducting the process every single time. Instead of manually copying and pasting scripts into your interface’s header and footer, you shift them to a container in the service. You can then use the Tag Manager’s dashboard to deploy the container and make the various integrations work. Let’s see how you can set up the tool with your WordPress website.
1. Create Your Google Tag Manager Account
In order to use the service, you will need to create an account on it. The tool is available for free and you do not need to pay any fee to create your account. Visit its website and you can log in with your existing Google account. In case, you have a Google Analytics account, it will be pertinent to use that ID to log in to the Tag Manager. Once you have successfully logged in, you will be asked to create an account.
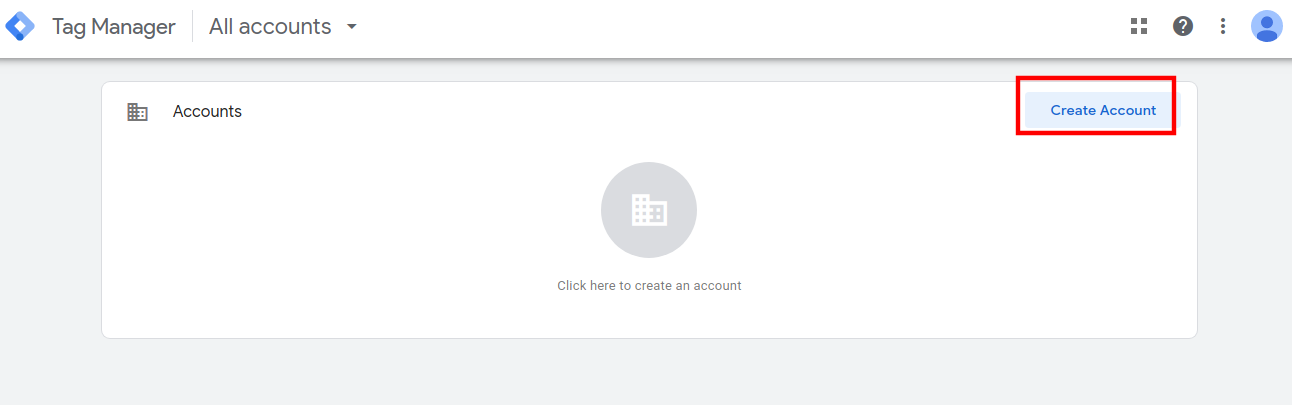
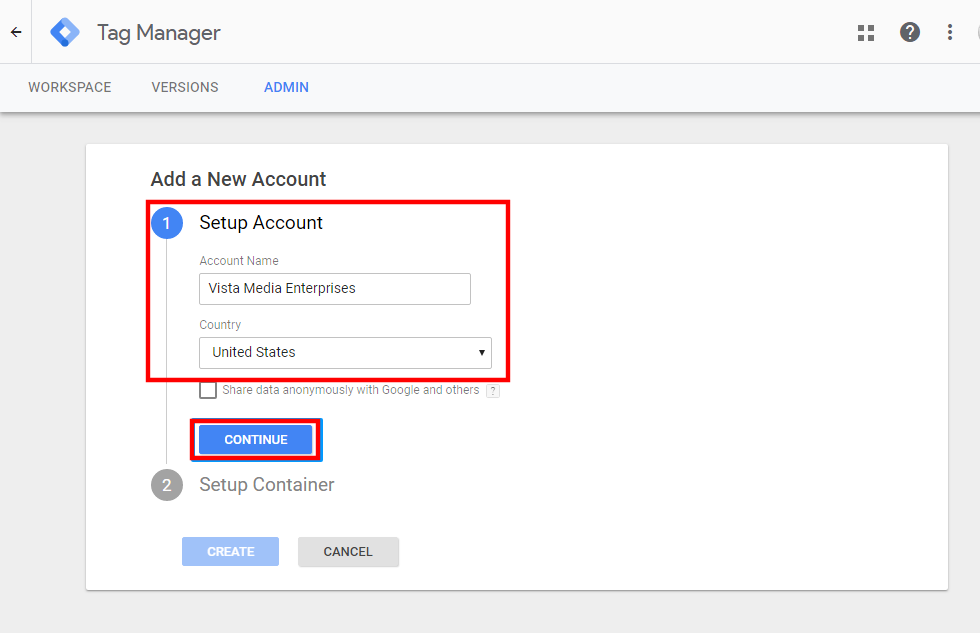
Click on the relevant link and you will be asked to provide a name for your account. Here you can enter the name of your company, organization, website, blog, etc. or any other preferred term. Select your country from the dropdown menu and then hit Continue.
You will now be directed to the second step of the process called Setup Container. Enter your website’s domain in the Container name field. In the Where to Use Container section, choose the Web option and then hit the Create tab.
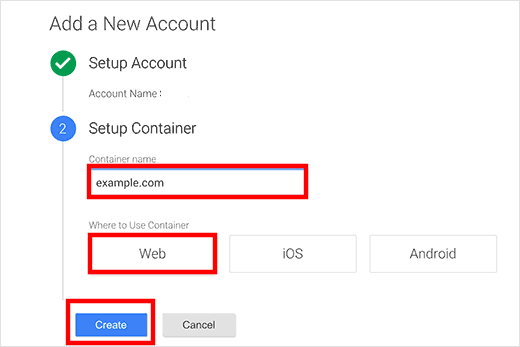
You will now be required to agree to the terms of service and once you do so, your account will be created.
2. Create A New Tag
In this next step to set up Google Tag Manager in WordPress, we will create a new tag. Then we will show you how the service can be integrated with your interface. Once your account is created, you will be able to view your dashboard. In the menu on the left-hand side click on the Tags option.
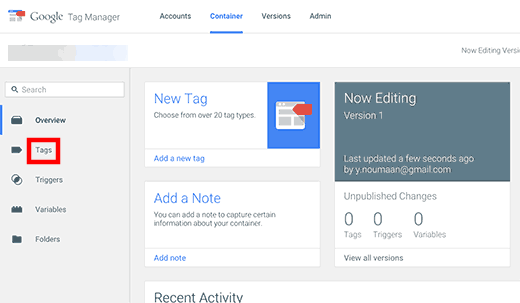
On the next screen, press the New button to create your new tag. There are numerous integration templates available in the service. In this guide, we have chosen the Google Analytics tag to display the process to you.
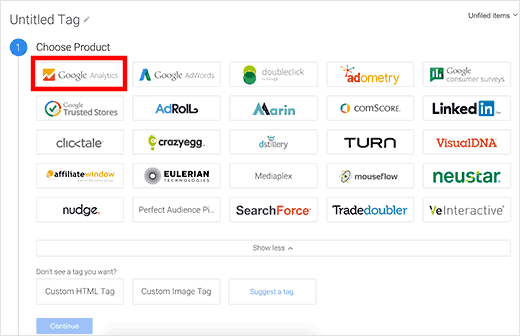
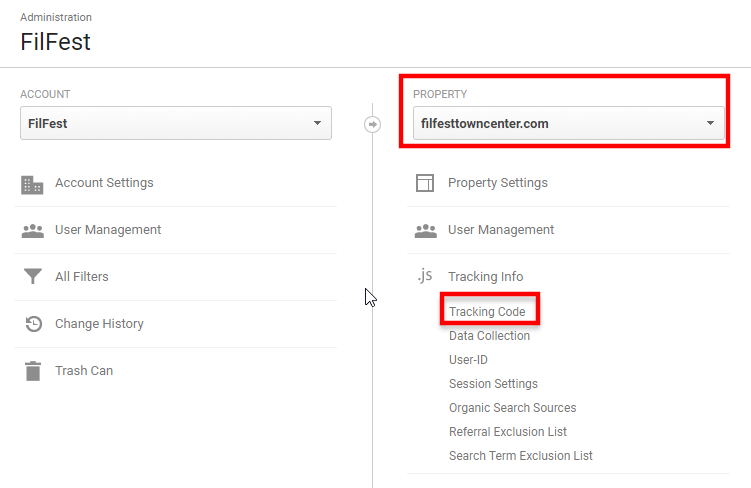
Remember you need to have an account with the third-party service in order to use its tag. Here, once we choose Analytics, we will be asked for a tracking code. This will help the Tag Manager identify our Google Analytics account. In order to access the tracking code, we will have to visit our Analytics profile. Log in to your Google Analytics dashboard and click on the Admin option located at the bottom of the left-hand menu panel. Then choose your website in the Property section. Now scroll down to locate Tracking Info and then Tracking Code option under it. Click it to access your UA tracking ID.
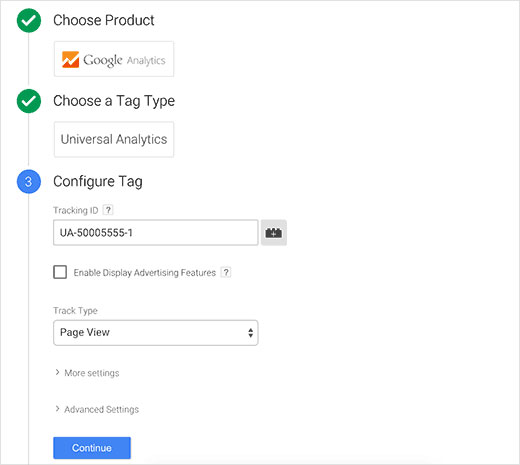
Copy the ID and paste it in the relevant field in the tag manager. Make sure that in the Choose a tag type section, you select the Universal option. In the Track Type dropdown, select Page View and then hit Continue.
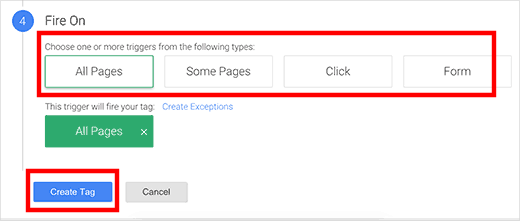
You will now have to define the pages of your interface, where this tag will be operationalized. Make the appropriate selection and then press the Create Tag tab.
You will now be presented with a tracking code that will have to be inserted into your website’s code. Do not close your dashboard. We will return to it in the last step of the tutorial.
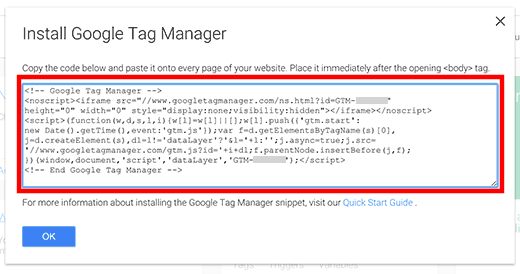
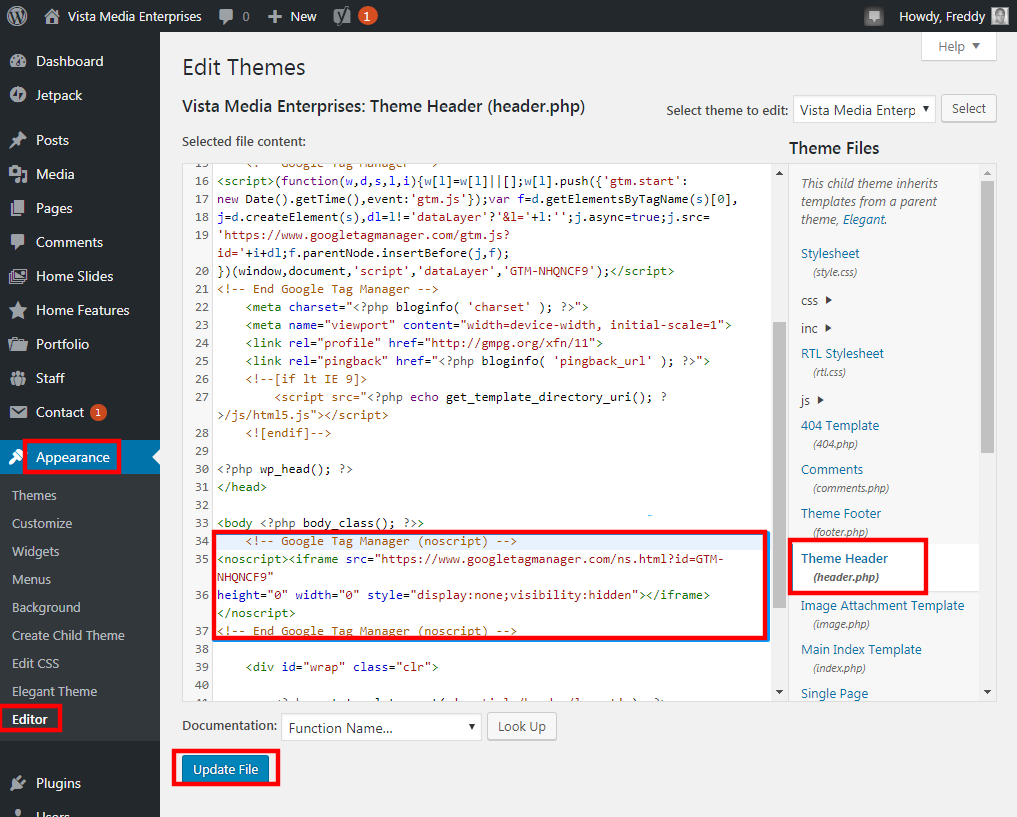
3. Add The Tag Code To Your Website
We will now add the code we generated in the previous step to the header of our website. You do not need to hire a WordPress web development company to do the job. However, it will be pertinent to create a backup of your interface before making the insertion. Go to Appearance > Editor in your dashboard. In the panel on the right-hand side, locate the Theme Header section to open the header.php file in the editor. Now paste the code after the <body> tag as shown in the image here.
4. Publish The Container
Go back to your Tag Manager dashboard and hit the Publish button. This will publish the container and the tag will be activated on your interface.

Your Tag Manager set-up is now complete.
Conclusion
The Google Tag Manager is a handy tool that will ease your website management tasks. In case, you need additional help in managing your tags you can hire professional WordPress developers to get assistance.