Our Blog
4 Steps To Update Old WordPress Posts With Gutenberg Editor
WordPress is a content management system providing users with a convenient way to add and modify content. People like it because of its intuitive nature which makes building and managing a website an effortless task. For a long time, the classic editor was its default modification tool. Things changed last year when in version 5.0 the open-source CMS made Gutenberg the new default editor. This change was primarily forced due to the audience’s preference for block-based editing tools. Many people who had got used to the old content modifier still find it hard to use the new editor. In this article, we are explaining the method to update old WordPress posts with Gutenberg. This will be helpful for users who are having teething problems while making the switch to the new content modification approach.
Difference Between The Old Classic Editor And Gutenberg
It will be pertinent to know how the new tool differs from the old default editor. This will help you in understanding how the modification process will work in Gutenberg. Take a look at the screenshot of the classic editor featured below:

People who have worked with Microsoft Word will immediately spot some similarities. There is a defined space for writing the text and formatting options are located on top of that box. It is a simple and efficient tool which was perfect for the time when it was introduced first. However, with the passage of time, users started noticing some shortcomings. A prominent one was that some elements like a content column required coding or the installation of extra plugins. Many people who switched HTML to WordPress theme complained that the default modifier lacked features provided by other solutions.
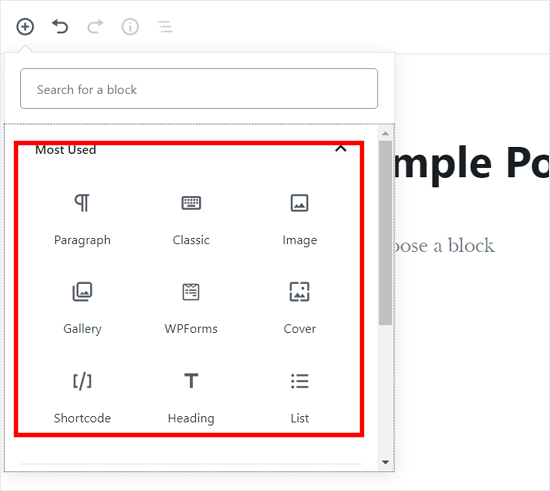
Gutenberg was created to eliminate these deficiencies and provide users with a modern modification solution. It is a block-based editor meaning you can add all types of content through blocks. There are separate blocks for all content types such as text, image, gallery, button, list, table, etc. Third-party plugins and themes are also providing more blocks and widgets which are compatible with the new solution. This is how the Gutenberg editing screen looks:
How To Edit Old Post With Gutenberg?
Much before making it the new default modifier, WordPress has offered it in the form of a plugin. This was done so that people would get used to the features of the solution and do not encounter many problems when the switch was made. However, some teething troubles are inevitable. One such issue is how to update old WordPress posts with Gutenberg. The following steps will show you how to conduct the process.
1. Open The Post In The Editor
People who have installed or updated the latest version will find Gutenberg as their default tool. Those who are still using the classic editor through the plugin must deactivate the tool to use this process. The first step is to open the post in the editor. Log in to your installation through your username and password. When you access your admin dashboard screen, locate Posts in the menu displayed on the left-hand side. Click on it and you will be presented with a list of all your posts with the most recent one right on top. Locate the article that you want to modify and open it in your editing tool.
2. Choose An Option To Edit The Post
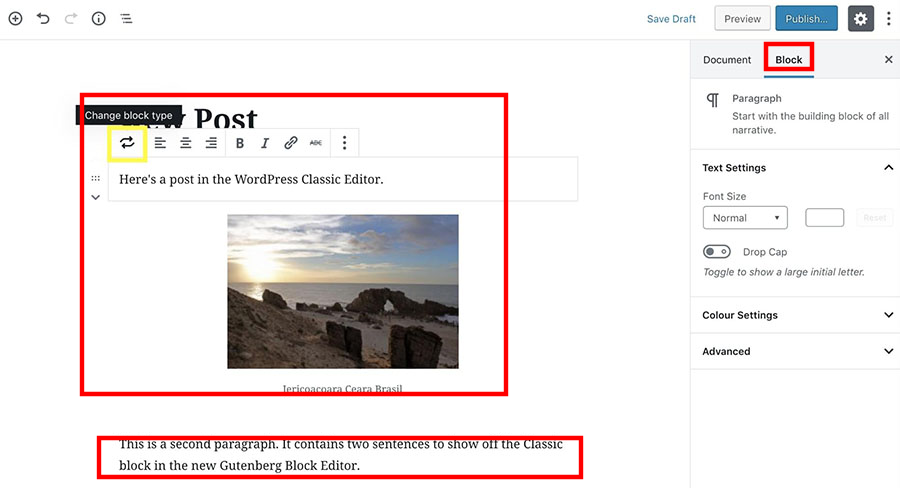
Once you have selected a post and opened it in the editing screen, you will find it wrapped it in a Classic block. See the image given below.
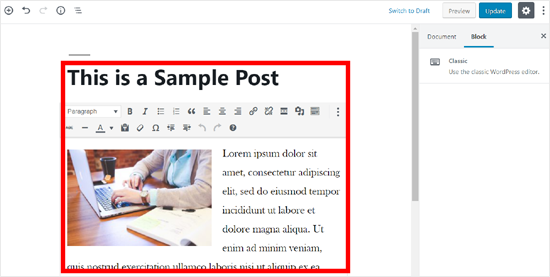
The content is open in the new tool but the block is just like the old default solution. Now, there are two ways in which you can conduct the desired modifications. The first is to continue the alteration inside the Classic block which you are currently seeing. The other is to convert this existing content into new blocks. We will explain both the options one by one.
3. Continue Editing In The Classic Block
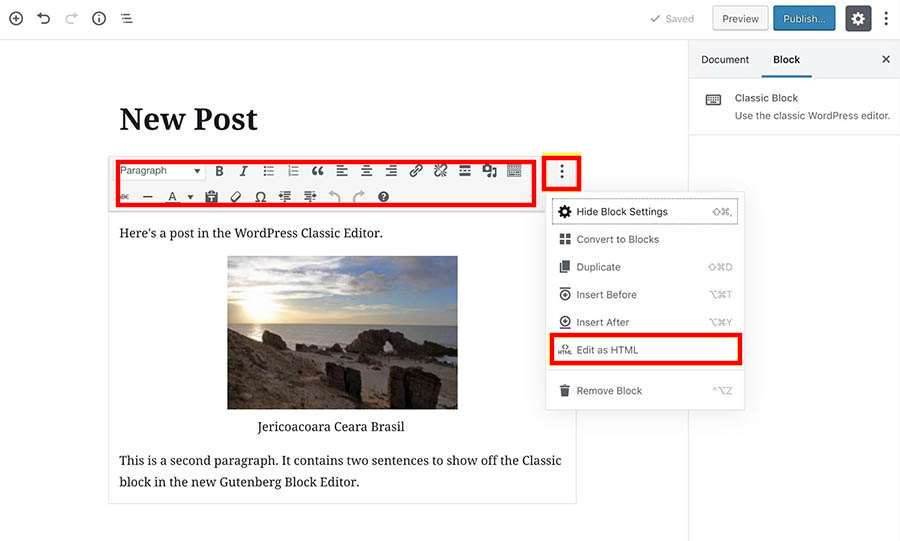
We will first discuss how the modification work can be done in the classic block. When you open the post it is displayed in the Classic box. Click on the box and you will see the editing options. They are presented in the form of the TinyMCE toolbar on the top of the box. You can do the editing just as you did in the old tool. The text editor can be accessed by clicking the three-dot icon and choosing the Edit as HTML option.
4. Convert The Content Into Gutenberg Blocks
Another option is to convert the content into Gutenberg blocks. Once again click on the three-dot icon and then choose the Convert to Blocks option. The entire post will be split up into different appropriate blocks. You can click on an individual block to view the modification options and make the alterations. You can also click on the Block tab to view more options.
Conclusion
Gutenberg is an efficient editing solution and not at all difficult to use. However, if you do not feel confident in switching to it, then you can hire a WordPress web development company to handle your modification tasks.