Our Blog
7 Simple Steps To Build An Online Course With WordPress
WordPress is the first choice for many people looking to start an online business. Whether it is running an online store or monetizing blogs through different means, the CMS provides an easy way for all options. One such business idea that allows you to earn money by sharing your knowledge with others is selling online courses. You can create paid study plans and offer them to interested students through your website. In this tutorial, we will discuss how you can build an online course with WordPress without any difficulty. All you need is a hosting subscription, domain name, and a WordPress installation and you can create a monetized study program in no time.
1. Install A Relevant Plugin
Once you have signed up with a dependable hosting service, acquired a domain name, and installed WordPress, it is time for downloading a suitable plugin. In order to create an online course, you will need to install a learning management system (LMS) plugin. These tools come with all the necessary features that will be required by you for running your study program. In this guide, we have chosen the LearnDash plugin. It is a powerful solution which will help you plan lessons, assignments, and quizzes besides tracking students’ progress and managing classrooms. Download the tool from its website and then log in to the admin dashboard of your website. Go to Plugins > Add new and then click on the Upload Plugin option. Activate the plugin after installation and move to the next step.
2. Configure The Plugin’s Settings
Go to the menu in the dashboard and locate the Settings option under LearnDash LMS. Click on it to open the settings screen. Then press the LMS License tab. You will now be asked to provide your license key and the e-mail ID.

Provide the information and then hit the Update License button at the bottom of the screen. Now, select the PayPal Settings tab. On this screen, you must enter your PayPal account details to integrate the service with your website. This will enable you to receive course fees and other payments easily. Save your settings and move ahead.

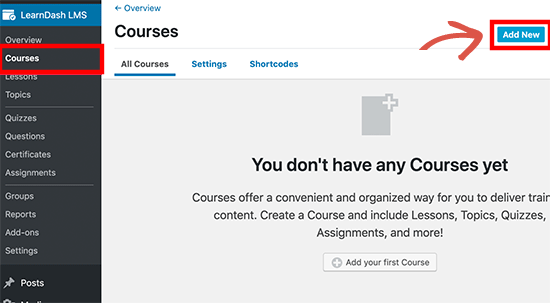
3. Create An Online Course
We will now create our first online course with the plugin. In the dashboard, locate Courses under the LearnDash LMS option and click on it. Press the Add new button which will open the editing screen.
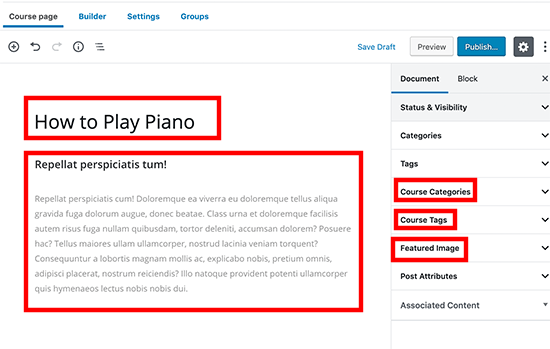
Enter a title for the study plan you are offering and provide a brief description of its features. You can add a featured image which will be displayed as the course thumbnail. Use post editor blocks to design the different sections of the page. There is also the option for including categories and tags to your course.
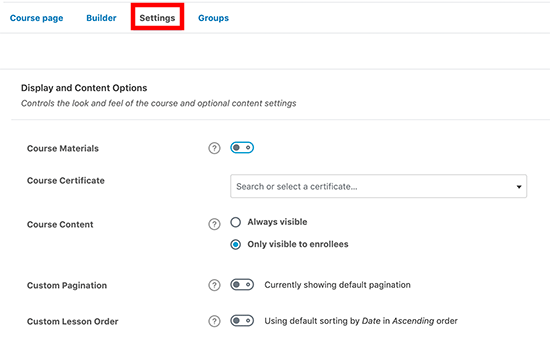
Click on the settings tab in the editor. Define the settings for displaying course content, its order of lessons, and pagination.
Scroll down the screen to locate the Course Access Settings section. Here you can set the status of your course. You choose to provide it for free or at a price pr close it completely by selecting the relevant options.
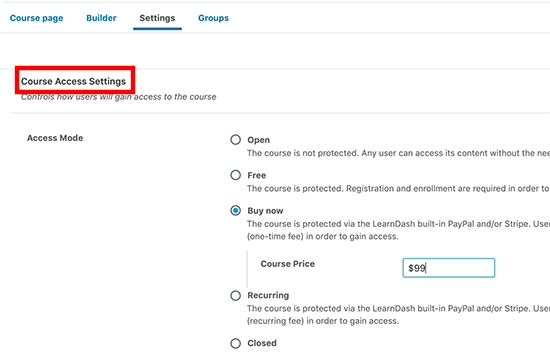
Move further downwards define some more access options. Click on the preview tab to check your changes and then press save or publish to make the course live for your audience.
4. Add Content To The Course
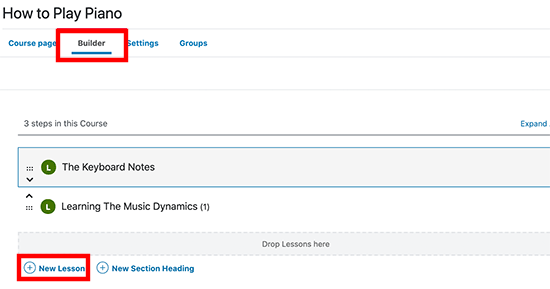
In this next step of our guide to build an online course with WordPress, we will add lessons to the study program. There are two ways in which content can be added to your course. The first is by using the Builder tab in the course editor. Select the tab and then hit the Add Lesson link to include a new chapter in your program.
The second is by using your default editor. Many people who have converted site to WordPress would be unaware that the block-based Gutenberg is the new default editor in the CMS. Go to Lessons under Learndash LMS. Hit the Add New tab to open the editing screen. Enter the title of the new lesson and then provide its content.
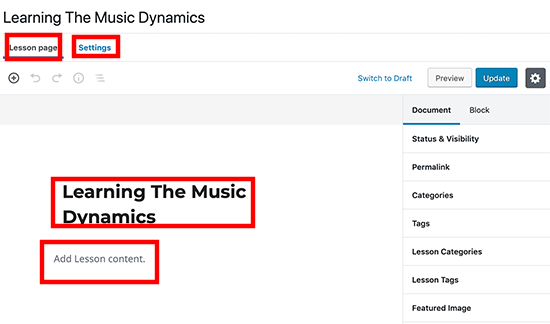
Once you have made all the modifications, switch to Settings and scroll down to locate the Lesson Access Settings section. Here, you can integrate the lesson with the preferred course define its access controls.

5. Include Assignments In Your Program
Assignments are an integral part of interactive learning. Go to Lessons under LearnDash LMS and then click on the Settings tab of the lesson with which you want to link the task. Turn on the button against the Assignment Uploads option. Then you can enter the relevant details for the assignment.

Students will now see an option for uploading their homework at the end of the lesson.
6. Create Quizzes For Your Course
You need to provide quizzes to test the knowledge of your students. Go to Learndash LMS > Quizzes in the dashboard menu. Press the Add New button and then provide a title and description of your test. Select the Settings tab and link the quiz to a course or lesson. Make some other settings configurations like autostart, questions display, etc., and then save your changes.

In the menu, go to Learndash LMS > Questions. Hit the Add new tab to open the question editor. Provide a title and a description of the query. Choose an answer type in the menu on the right.

Shift to the Settings tab and link the question to the quiz you created just now. Hit the save button and then add more queries in the same manner.
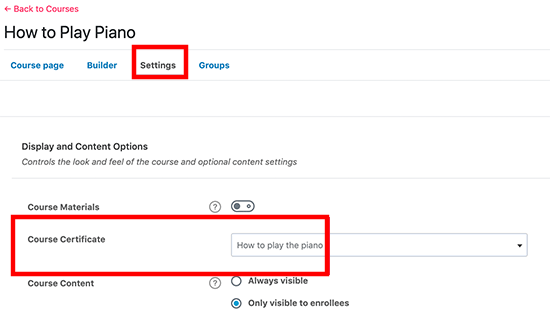
7. Giving Certificates For Successful Course Completion
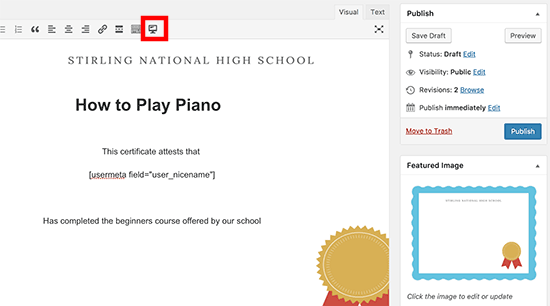
You can give certificates to users who successfully complete your learning program. Knowledge of basic HTML is necessary for creating a certificate with the plugin. First, get a template for the document from a free image source. Go to LearnDash LMS > Certificates and press Add New. Set the image you acquired as the background of the certificate. Then you will have to use shortcodes to add all the necessary data. Switch to the Settings tab and then link the document to a course, quiz or lesson.
Go to the Settings of course with which you are offering the certificate. Add your document in the Course Certificate section to complete the process.
Conclusion
Selling online study plans allows you to utilize your knowledge or skills for earning money. You can easily create and manage such courses with the LearnDash plugin by using the process explained here. However, if you do not feel confident then engage an agency which provides WordPress developers for hire to complete your project.