Our Blog
A Guide To Create An Online Store With WooCommerce
A large number of websites being developed these days are e-commerce interfaces selling products or services. The increasing popularity of online shopping has contributed to this trend. Creating a virtual outlet has become easier with the emergence of builder tools. One such solution which lets WordPress website owners easily add a shop to their websites is WooCommerce. This powerful plugin contains all the necessary elements required to build and operate a virtual store. In this article, we will discuss how to create an online store with WooCommerce. Anyone who owns a WordPress website can easily add an outlet to their interfaces with the plugin by using the following process.
1. Create A WordPress Website
WooCommerce is a plugin which lets users add an e-commerce store to their website. The first step is to create an interface on which the solution can be activated. Good user experience is essential for the success of the business venture. Sign up with a managed WordPress hosting service provider as they will ensure fully managed servers, automatic updates, security, and backups. They will also make sure that your interface does not go down during peak traffic. Then you must choose a suitable theme for your commercial venture. There are numerous free as well as premium readymade templates built for e-commerce websites. Choose one which fits your requirements and install it on your website. Do not forget to purchase an SSL certificate to secure your shop.
2. Install The WooCommerce Plugin
You will now have to install the WooCommerce plugin. It is offered by Automattic, the group which manages the affairs of WordPress. This 4.5-star rated product is one of the most downloaded items in the CMS’ history. It is also one of the most popular solutions for building e-commerce websites. You will have to log in to your admin dashboard. In the menu, click on Plugins and then go to Add New. Search for the plugin by entering its name in the search field. Locate the correct option among the search results and download its files. Once the installation is complete, activate the tool on your interface and move to the next step.
3. Create The Key Pages
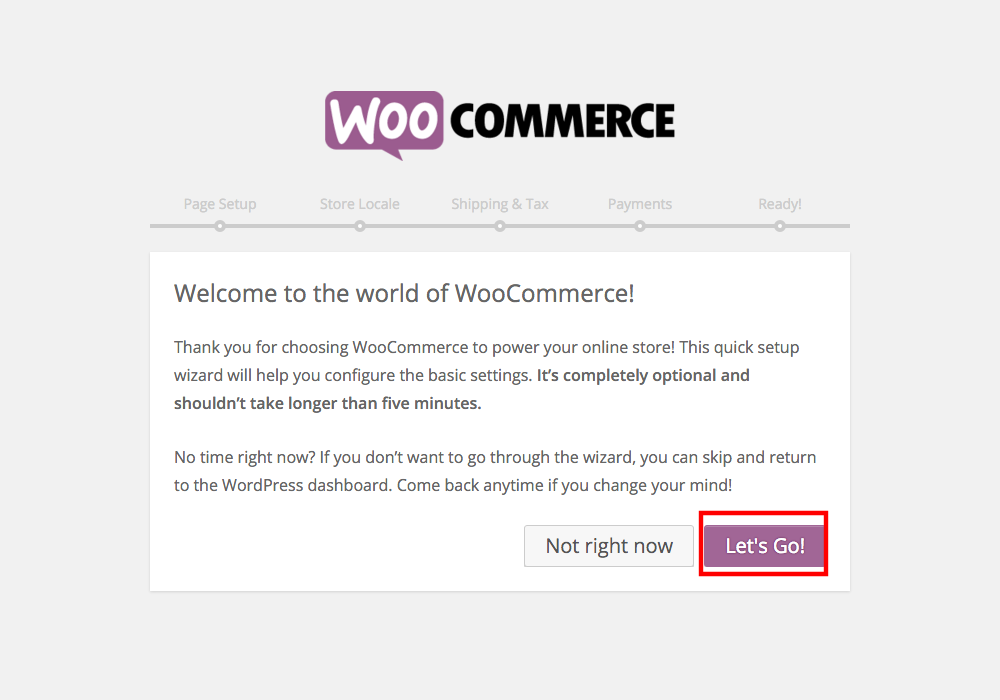
As soon as the tool is activated, you will be prompted to begin the setup. WooCommerce is a prime example of the convenient nature of WordPress website development. You only need to configure the settings to generate the man pages of your interface. There is no need to write or input code and everything can be done by choosing the correct options. Hit the Let’s Go tab to start the process.
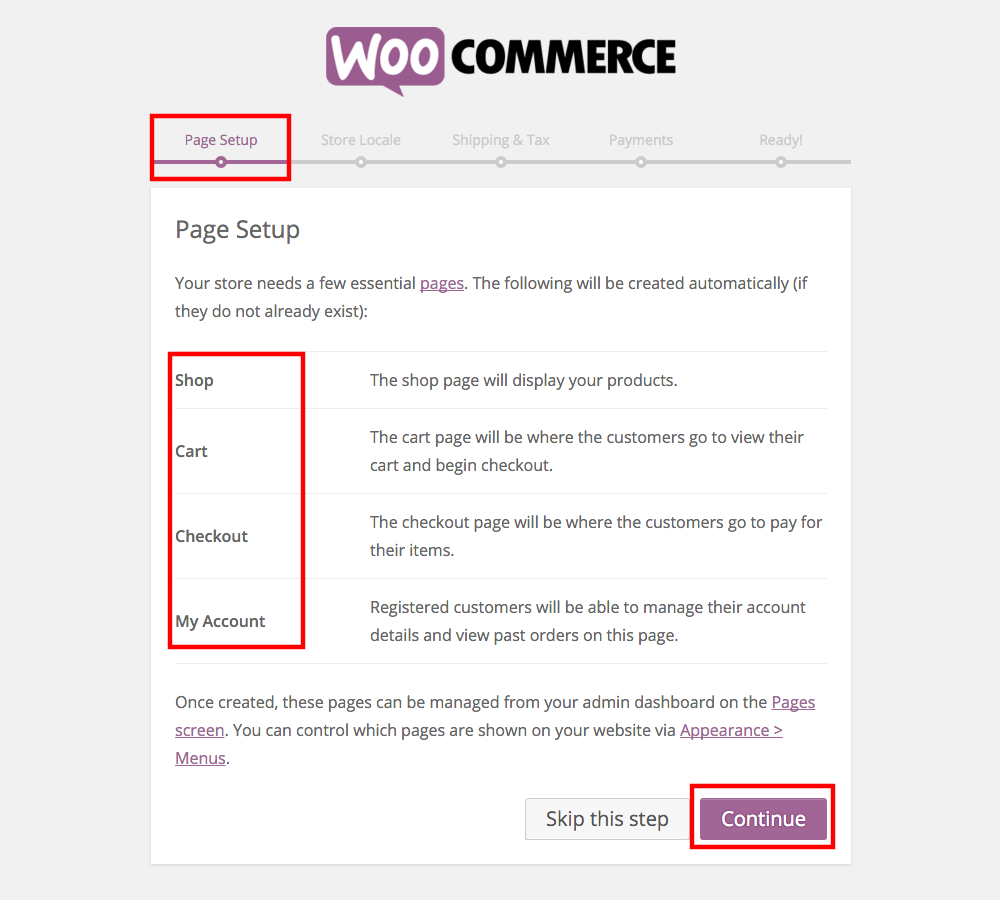
You will be directed to the Page Setup screen. Click the Continue button at the bottom of your screen. This will automatically create pages like the main shop, shopping cart, checkout, and the default customer account pages.
4. Define Your Store Location And Preferred Currency
In this next step of our guide to building an online store with WooCommerce, you will need to define a location for your business. After the completion of the previous step, you will be taken to a new screen titled Store Locale. You are creating a virtual outlet but your customers must know the geographical location of your business. Choose your location in the dropdown menu against the first option “Where is your store based?”. Then in the next option set the currency in which you will conduct the financial transactions. You can also define the unit for defining product dimensions as well as weights. Make your selections and then press the Continue button.

5. Select The Shipping And Payment Options
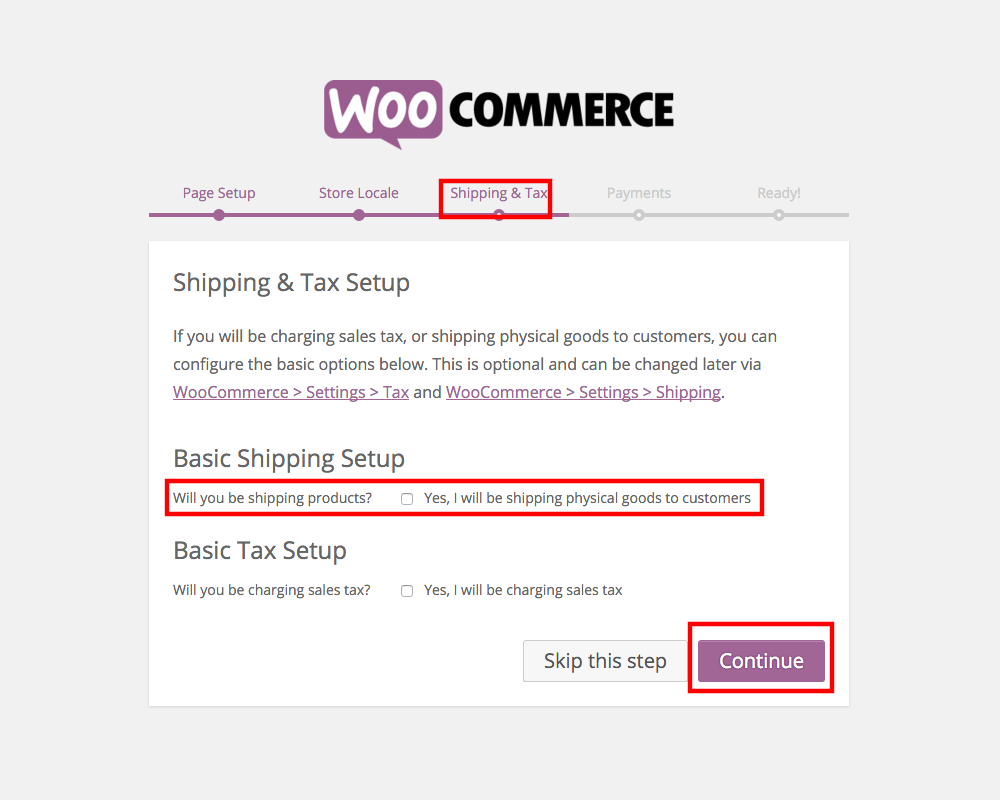
In order to complete your page setup process, you will need to choose the shipping and payment options. Once you configure the Store Locale settings, you will be taken to the Shipping & Tax screen. In case you are selling physical goods, then you will have to tick the box against the “Will you be shipping products?” option. However, the shipping and tax setup settings are optional and can be modified again afterward. Press Skip this step or Continue to go to the Payments settings.
There are multiple ways in which a store owner can receive payments. You can choose to accept payments through cheques or bank transfer. There is also the option to enable your clients to pay cash on delivery. The best way will be to accept payments through Paypal. Users can enter their PayPal e-mail ID to integrate their account with the outlet.

This completes the page setup of your store.
6. Configure Additional Settings
In your dashboard, locate WooCommerce and go to Settings. In the General tab change the default customer address.
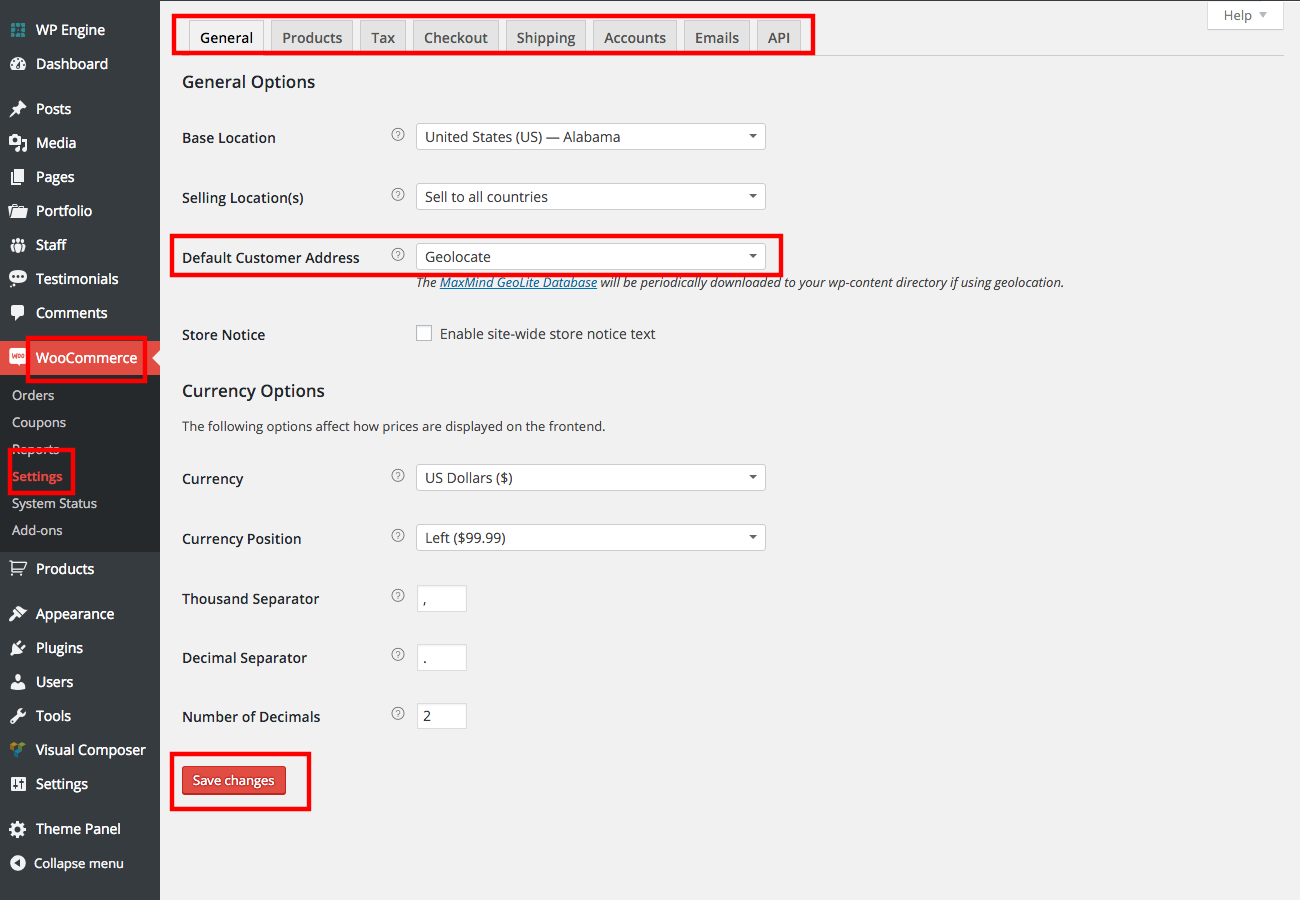
Go to the Shipping tab and enable free shipping if you want to. Then move to the Emails tab and change the recipient email for the standard e-mails for orders. For instance, you may want to send confirmed orders to the shipping section. Save all the changes and move to the next step.
7. Add Products To Your Store
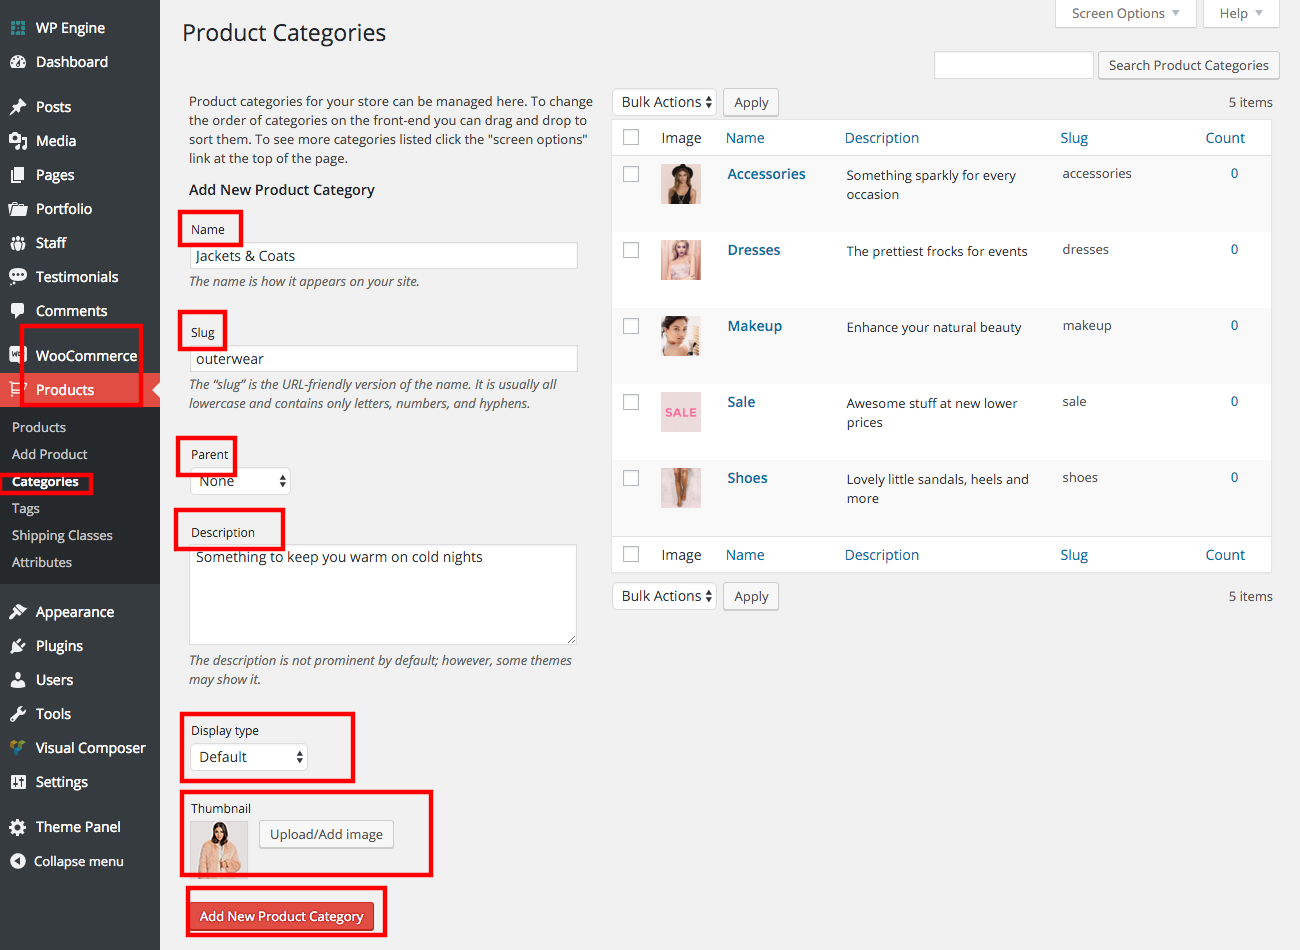
Go to Products > Categories in the WooCommerce section of your control panel. Enter a name and URL for a new category. You can also define it as a category parent. Add a description and an image besides selecting the display type. Click the Add New Product Category button.
Select Products and then click Add new. Enter a name for the item and assign a category to it. You can also add a featured image along with gallery pictures. Provide a detailed product description in the first text field. In the second box, you can enter a brief description which will be displayed alongside the image.
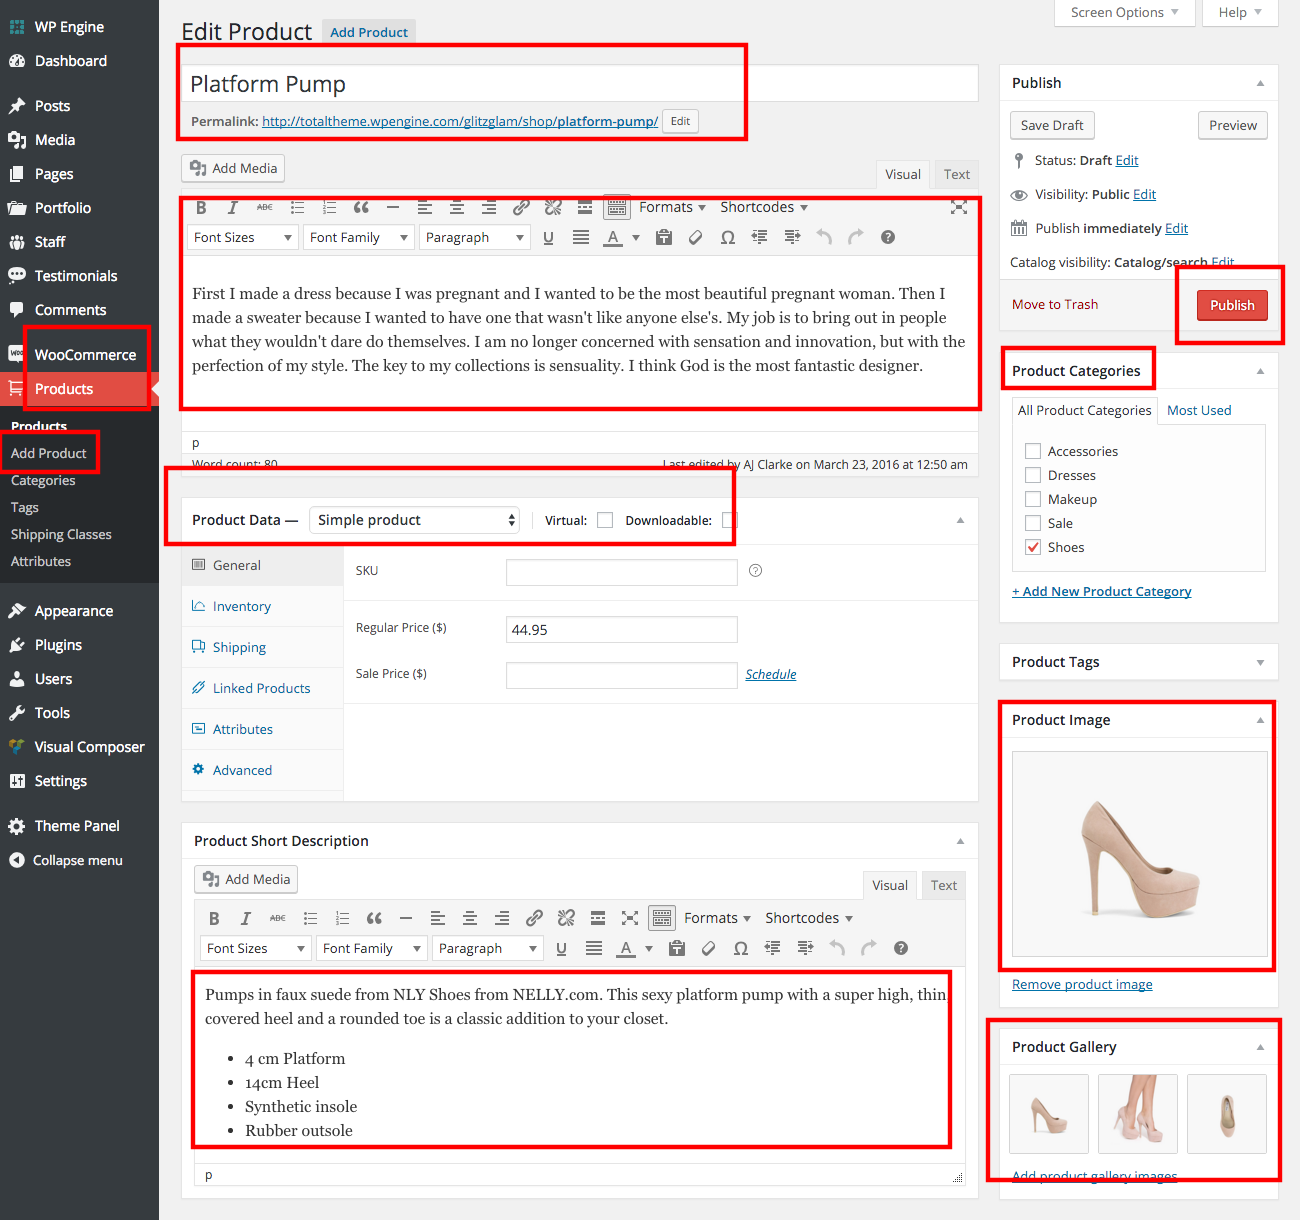
In the Product Data menu, you can choose the Simple product option for physical goods. You can make the relevant changes in the settings. In case, you tick the Downloadable box, you will be presented with some additional options. Checking the Virtual box will remove the Shipping option. Save all the changes and your WooCommerce store is now ready for operation.
Conclusion
This guide will enable you to build a simple virtual outlet. However, hiring professional WordPress developers will be helpful in leveraging the full potential of the powerful e-commerce solution and building a high-quality store.