Our Blog
A Simple Guide For Adding Google Forms To WordPress
A website is an important tool for promoting and growing a business. Forms play an important role in meeting this objective as they provide an easy way to gather information. Clients hiring custom WordPress development agencies ask professionals to include contact forms on key landing pages. The users of the open-source CMS can take advantage of numerous products to place a form on their interfaces. Google Forms is one such convenient service which lets people introduce the beneficial feature on their websites. In this guide, we will present information about adding Google forms to WordPress in a simple manner.
Why Should You Use Google Forms?
Google Forms is a free-to-use form-building tool developed by the search engine giant. This service can be used to insert forms for gathering all kinds of information from visitors. WordPress plugin development has ensured that there are numerous plugins that serve the same purpose. Just like the Google tool, these plugins can be used to create customized and attractive forms. Sometimes users need to share these forms on other platforms such as e-mail lists or other website pages. Google Forms can be a more convenient option in such cases.
People can use the product to create surveys, quizzes, order forms and even receive file uploads through them. All the information gets stored in the Google Drive account of the user which can be easily accessed at any time. All forms created with the service are responsive meaning that they will be displayed perfectly irrespective of the screen size. A very powerful tool that provides flexibility to website owners in creating and using forms.
How Can You Create A Google Form?
Let’s now learn how can a form be created with the product.
Step 1
In order to be able to use the service, you must have a Google account. Using the account username and password, log on to Google Forms. You will be taken to a page with some form templates after successfully logging on. There will also be a completely blank form without any fields available. You can either choose a pre-loaded template to start building your form or start from scratch on the blank page. The templates have been divided into various categories making it easy for beginners to choose one for their website.

Step 2
You must now choose the fields of your form. Take a look at the image given below displaying a contact form. There are standard fields for name, email, address, phone number, and comments. See the “+” icon in the menu on the right-hand side of the screen. Clicking on it will help you multiple fields in a given option or include a completely new option in the form.
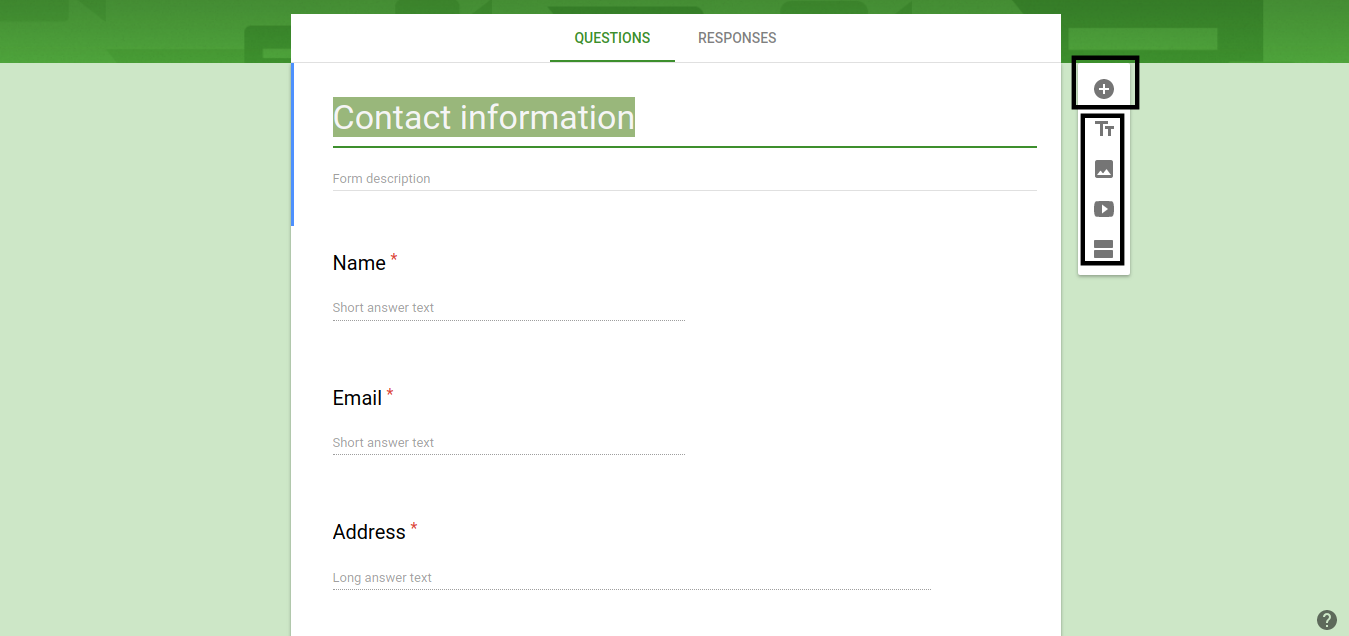
The options below the “+” symbol are for adding a title and description, images, videos or a new section.
Step 3
Including queries in a form is very easy. Click on “Questions” and you can insert a field for a chosen inquiry. Users can also select the manner in which a visitor will reply to a question. They choose to give multiple choice options or ask guests to provide descriptive answers.

Step 4
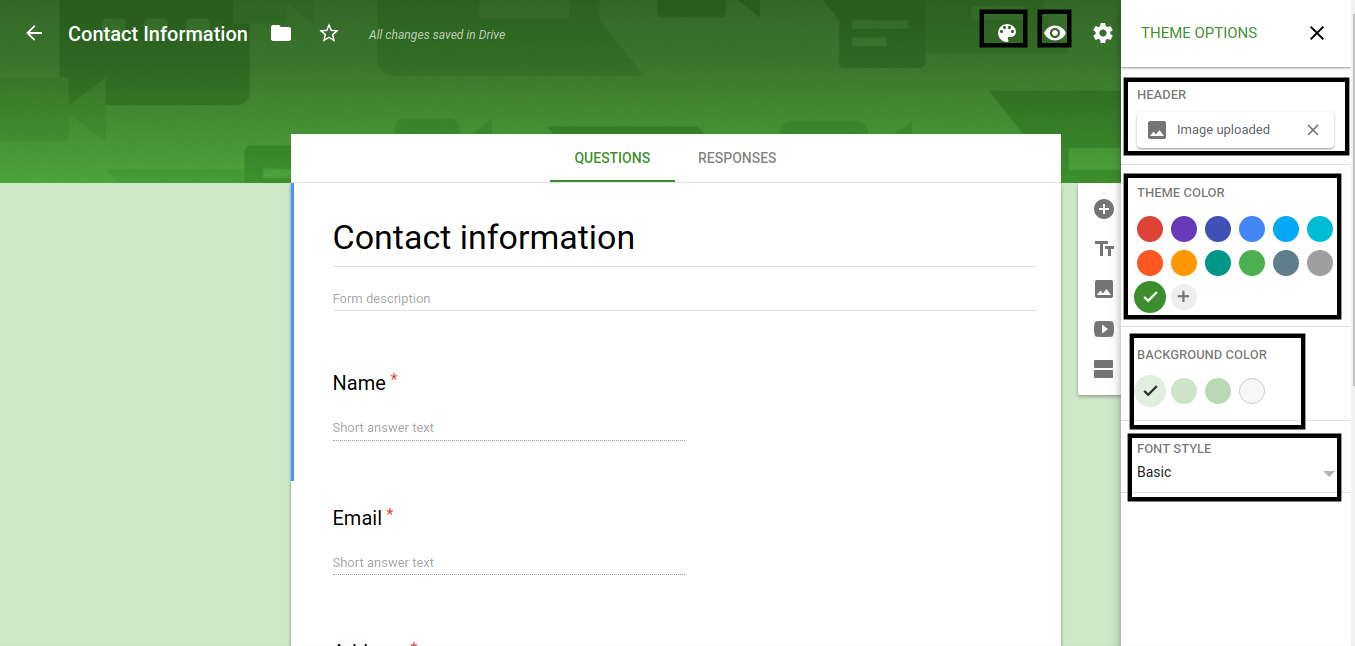
You can impart a completely unique look to your form. On the top is the option for customizing the theme where you can make changes to theme and background color. Users can also select a pre-loaded image in the header or upload one from their album. Right at the bottom of the menu is the option for changing the font.
Step 5
Click on the “Settings” tab and choose the manner in which you want people to access the forms. You can also choose the way in which you want to get notifications about responses besides the location where you want them to be stored.

Save all the changes to complete the process of form-creation
How Can You Add Google Forms To Your WordPress Website?
We will now present the method for adding Google Forms to WordPress.
Step 1
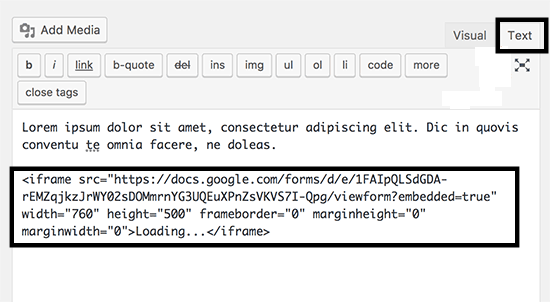
Once the form has been created, you can now display it on the website. In the top right-hand corner of the screen, you can see the “Send” button. Click on it and you will be presented with options for sharing the form through email or URL. There is also another option available which we will be using. This method involves embedding the HTML code of the form in the website.
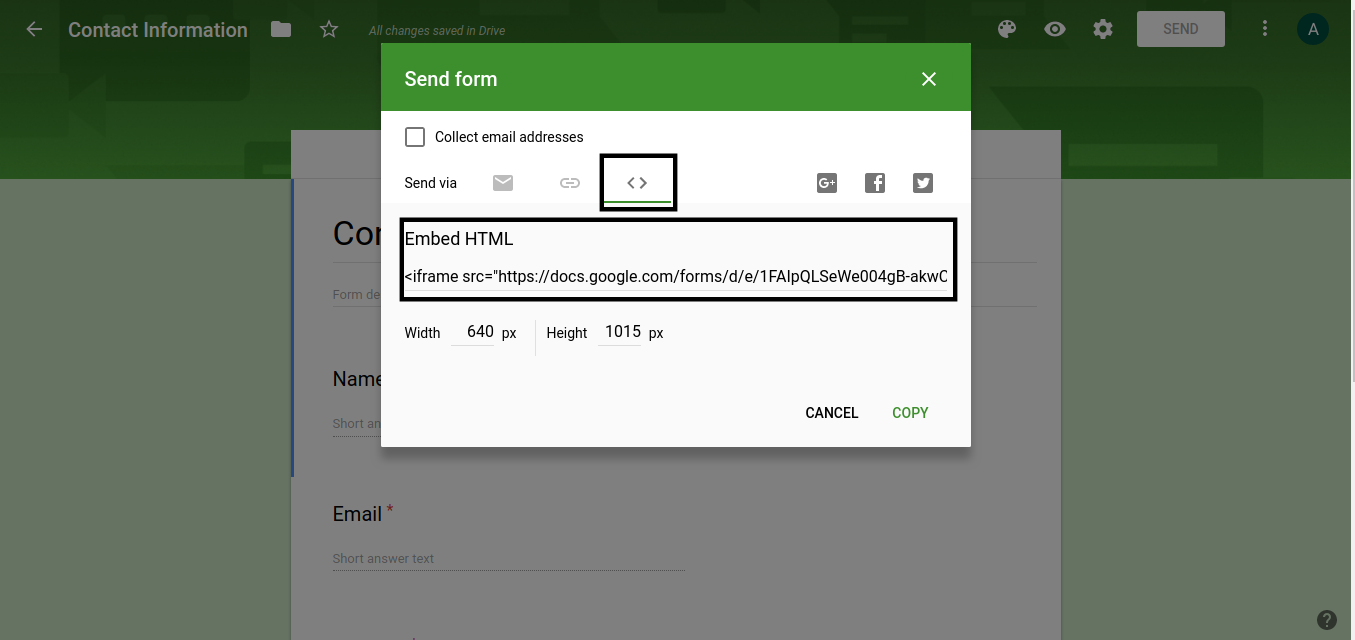
As soon as you click on the tab, the code becomes visible under the title “Embed HTML”. Copy the code given in the field.
Step 2
Log on to your WordPress installation to access the admin dashboard. If you want to display the form on a new page then select the “Add New Post” option after clicking on “Post” in the menu.
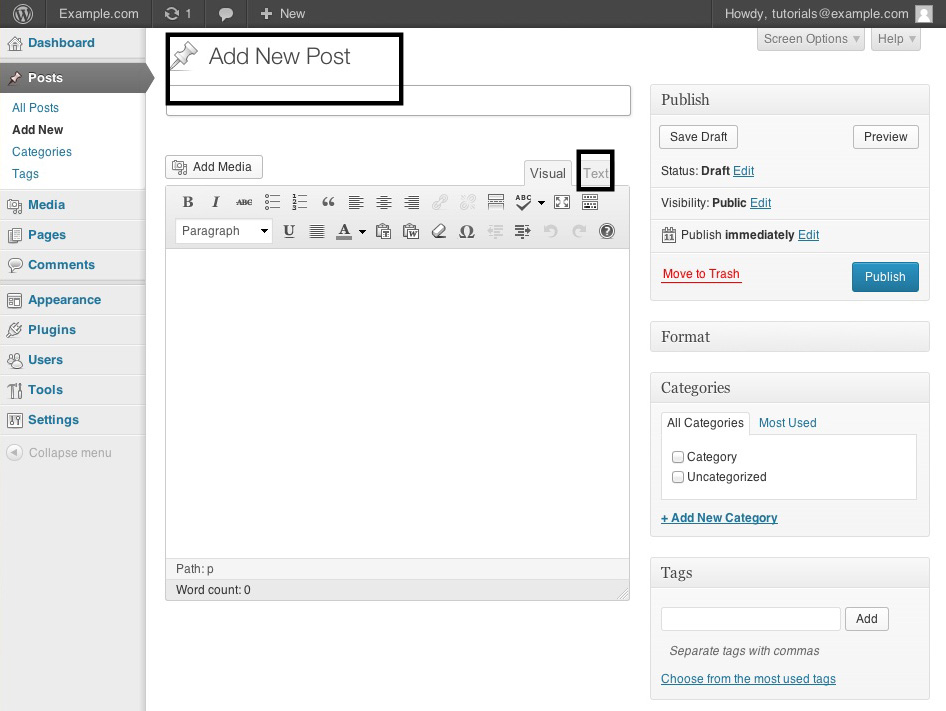
Many users want to insert the form on an existing page. They can do so by going to that page and choosing the “Edit Page” option. Shift to the text editor mode. Choose the location on the website where you want the form to be seen. Paste the code there and save the changes. The form will now be visible on your website.
Conclusion
Adding Google Forms to WordPress websites allows owners to introduce a beneficial feature on their interfaces which can help them improve their conversion rate and grow the business.