Our Blog
A Simple Guide To Set Up Yoast SEO In WordPress
A major reason for WordPress’ popularity is that it is an incredibly SEO-friendly platform. It has in-built features for defining an efficient URL structure besides adding title and meta description to each page. However, you can maximize the potential of the platform by installing SEO plugins. In this guide, we are discussing the correct way to set up Yoast SEO in WordPress which is one of the best plugins available for this purpose. The extensive range of features which this tool contains can confuse many users. This makes it necessary for them to know the correct way to use the plugin. This will help them explore the full potential of the solution and achieve the best possible results.
Install The Yoast SEO Plugin
Experienced users will know how to install a plugin but new users like those who have just converted HTML to WordPress theme will need help. Log in to your admin dashboard and hover the cursor over Plugins in the menu. Then choose Add New to open the Plugins screen. Use the search box to find the plugin. Hit the install tab displayed along with the tool. After installation, click the Activate link and move ahead.
Setting Up The Yoast SEO Plugin
We will now set up the tool on our website.
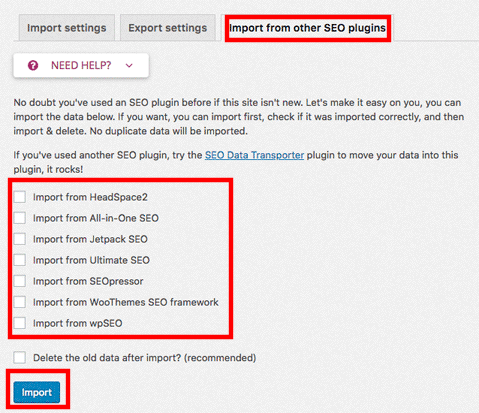
1. Import Data From Other SEO Tool
In case you are already using an SEO plugin, then you will need to transfer data from that tool to Yoast. The plugin has a feature for the purpose which can be accessed by visiting SEO > Tools> Import & Export. Once you activate the solution, the SEO icon is added to the control panel. Press the Import from other SEO plugins tab. Here you will find a list of tools from which you can import the data. Just select the plugin and hit the Import tab.
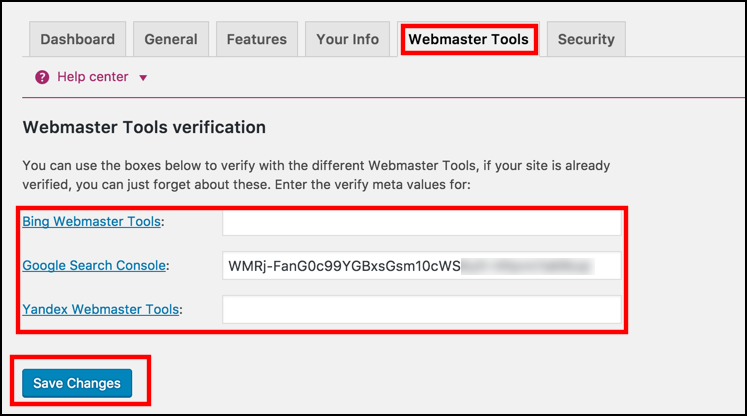
2. Link Your Webmaster Tools
The plugin allows you to submit your interface to all major search engines like Google, Yandex, and Bing. Go to SEO > Dashboard > Webmaster Tools.
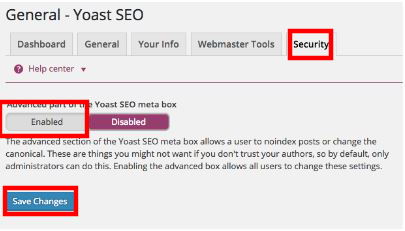
3. Define Security Access
People who own blogs which get contributions from multiple authors would want to restrict the access to post customization. This can be done by visiting SEO > Dashboard and clicking on the Security tab. Hit the Enable button to allow only users with administrator access to conduct modifications.
4. Configure Titles & Meta Settings
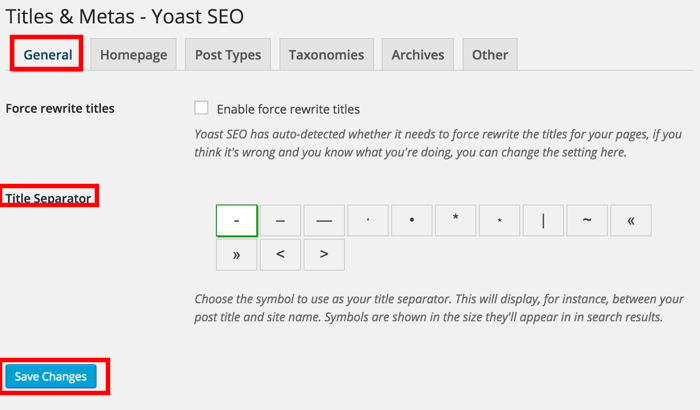
We will now configure the settings which will control the optimization of the titles and meta descriptions of our web pages. Under the SEO icon in the menu, you will find an option named Titles & Metas. Click it and then select the General tab. Here you can choose a separator symbol for your title.
Switch to the Homepage tab and select how the title will be displayed in the Title template field. You can also define the homepage meta description template in the specified field.

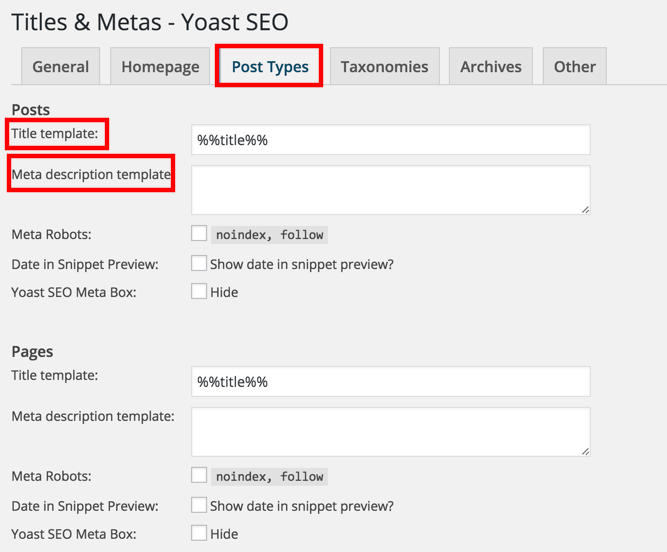
Shift to the Post Types tab and define the title and meta templates for posts and pages. The configurations made here will define how your post/page titles will appear in search results.
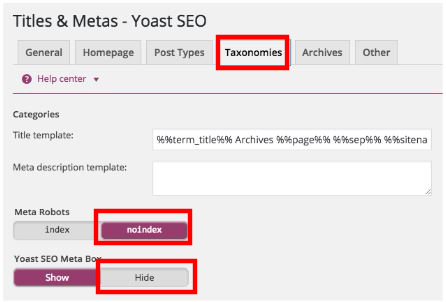
Move to the Taxonomies tab and configure the settings according to your SEO strategy. Usually, people turn Meta Robots to noindex and hide the Yoast meta box.
Move to Archives to define the indexing for your author and date-based archives. Disable author archives and turn Meta robots to noindex to eliminate chances of duplicate content.

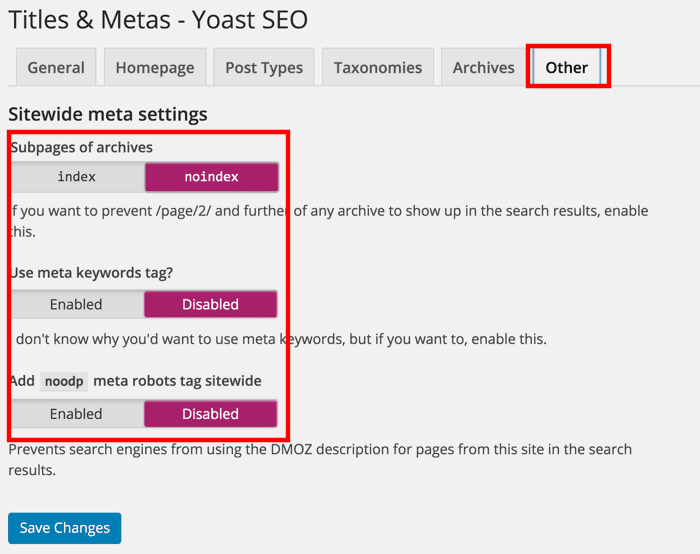
In the final tab named Other, you can define the settings as shown in the image here. This will keep the blog head section clean by hiding unnecessary items.
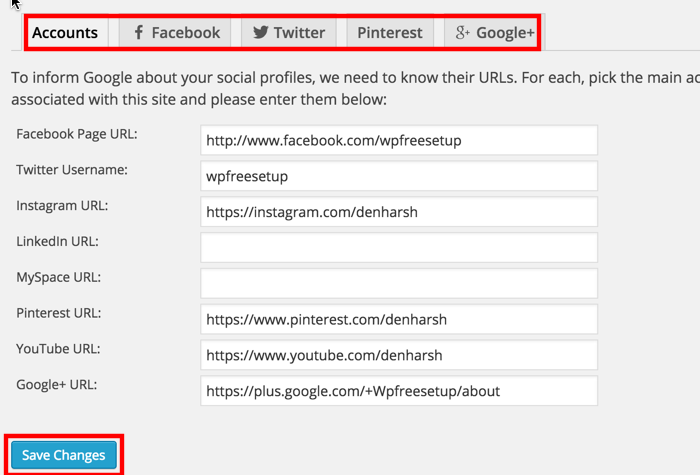
5. Configure Social Settings
The next step in the process to set up Yoast SEO is to configure the social settings. Go to SEO > Social and add all your social accounts in the specified fields. You can then select the relevant tab to define the settings of each account. Users are allowed to configure Facebook Open Graph metadata and set a default image.
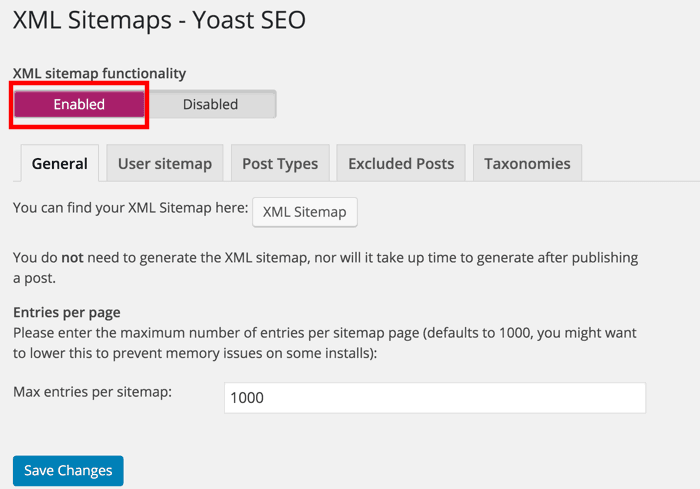
6. Generating XML Sitemaps
XML Sitemaps help search engines in understanding a website in a better manner and index its pages. Yoast SEO has a feature for generating XML sitemaps which can be enabled by visiting SEO > XML Sitemaps.
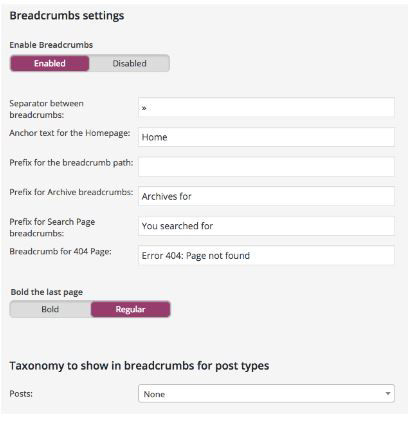
7. Enable Advanced Settings
Go to SEO > Advanced to modify the advanced settings of the tool. Select the Breadcrumbs tab if you want to enable the feature. Breadcrumbs define the path visitors will take to reach the desired page. They help search engines in understanding the structure of an interface.
Switch to the Permalinks tab where you can modify the settings to optimize your existing link structure even more. WordPress has an in-built feature for the purpose and Yoast can help make it even more efficient.
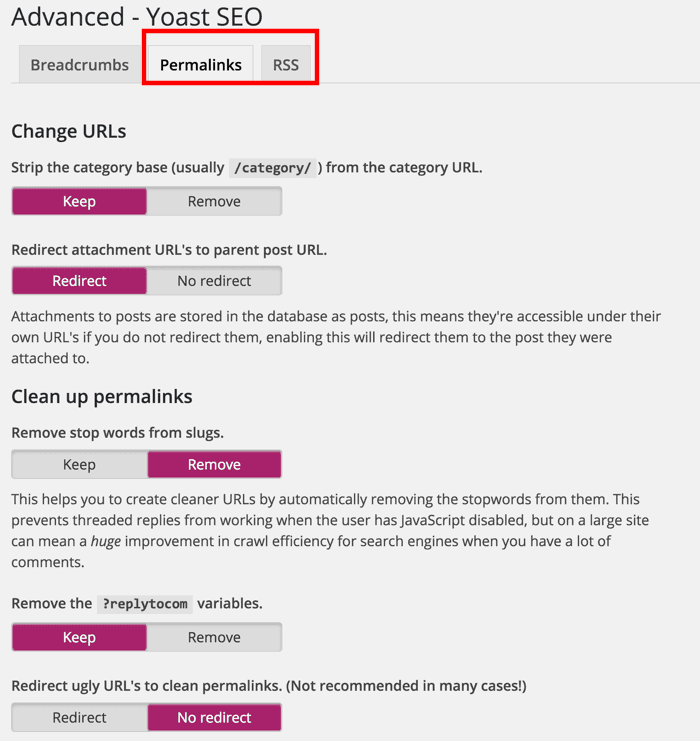
Move to the RSS tab where you can add a link back to all the blog posts.
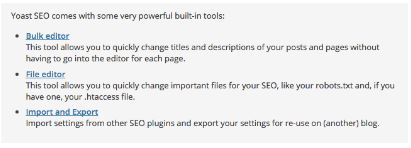
8. Know About In-built Tools
Visit SEO > Tools and you will access some handy tools. You can use the bulk editor to edit multiple titles and descriptions. The file editor can be used for modifying the robots.txt and .htaccess files. Be careful and alter these files only if you possess enough technical knowledge. We discussed the Import & Export functionality right at the beginning of this guide.
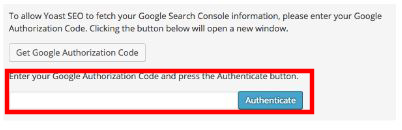
9. Link The Tool To Your Search Console Account
Chances are you will be using Google Search Console to monitor the indexing of your web pages. Here you can link that account to the tool by entering the relevant verification code in the specified field.
10. Optimize Posts And Pages
It is now time to try the features of the plugin. Open any post or page in the editor. You will find the Yoast meta box below the editor. Here you can set a focus keyword for the content along with the snippet preview. The tool will conduct a readability analysis of the content and present a set of recommendations to improve it.

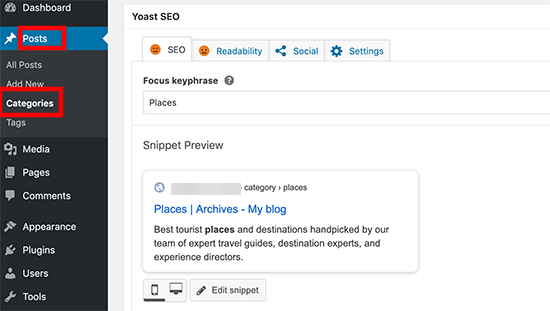
11. Optimizing Taxonomies With The Plugin
Go to Posts > Categories and click the edit link below a category. You will notice the Yoast meta box at the bottom. Here you can optimize categories, tags, and custom taxonomy archives.
Conclusion
This guide will help you in setting up the Yoast SEO plugin in the correct way on your website. In case, you want to fully realize the potential of the tool, then you must hire a WordPress development services professional for the purpose.