Our Blog
How To Build Custom WordPress Layouts With Elementor Page Builder

The major reason that has made WordPress the number 1 web development platform in the world is its minimal dependence on coding. It does not matter if you are not a certified programmer, you can still build a website with the help of readymade themes. These pre-fabricated templates have all the necessary pages and features and can be modified extensively. However, there are situations when you require a unique looking appearance for a post or page. In such circumstances, you will have to use coding to get the desired result. Here we are discussing how you can build custom WordPress layouts with Elementor, which is a page building tool. This handy solution will enable you to build a personalized layout without needing to write any code.
What Is Elementor?
Elementor is a block-based page building tool that is available in the form of a plugin. It contains a wide range of pre-built page/ post templates and modules for different content types. You can choose an element and simply drag and drop it on your editing screen. Then you can alter the modules according to your wishes to generate your personalized design. The plugin is available to users since pre-Gutenberg days when the open-source platform did not have a block-based editing tool. It is one of the most popular products in its domain and a prime example of the user-friendly character of WordPress plugin development.
How To Build A Custom Layout With Elementor?
Here is a basic tutorial for beginners to use this convenient tool to create a custom layout.
1. Install The Elementor Pro Plugin
Elementor comes in two versions, a free plugin and a premium variant called the Elementor Pro. We are using the paid alternative as it has the features we need to fulfill our purpose. You will have to purchase the product by visiting its developer website. You will be provided the plugin in the form of a zip file. Log in to your admin dashboard and go to Plugins > Add New. Hit the Upload Plugin tab and then select the zip file. Once the installation is complete, do not forget to activate the tool.
2. Configure The Plugin Settings
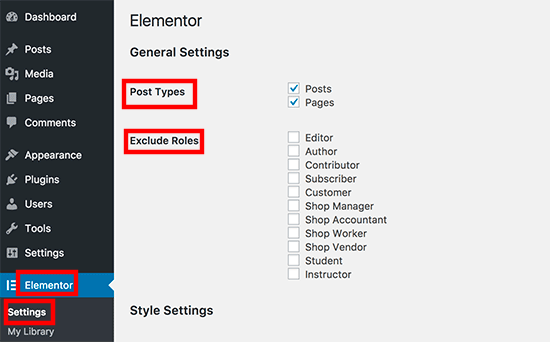
After activation, a new option called Elementor will be added to your control panel menu. Locate this option and go to Settings. Here you will see that by default, the tool is enabled for your posts and pages. In case, your interface contains any custom post types, then the plugin can be used with them also by simply checking the relevant boxes. You can also other users to have access to the builder by configuring the settings. Once you have defined all the conditions, move to the next step.
3. Create A New Page Or Post
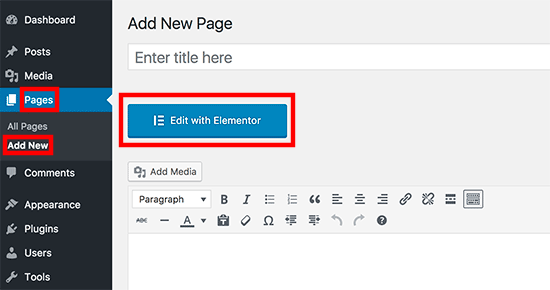
In order to learn how to build custom WordPress layouts with Elementor, you will have to first create a page or post. In the image given here, we have created a new page by visiting Pages > Add New. You will see an “Edit with Elementor” button right on top of the editing area. Hitting it will launch the builder where you can make all the modifications.
4. Select A Template
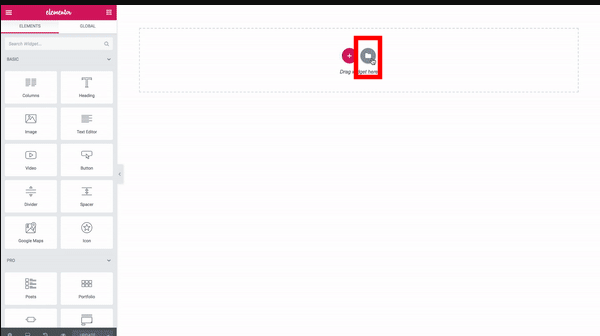
On the next screen, you will see two options. You can select the “+” icon to create a completely new design. If you choose the other icon as shown in the image given here, then you will be displayed all the pre-built layout options that the plugin contains.
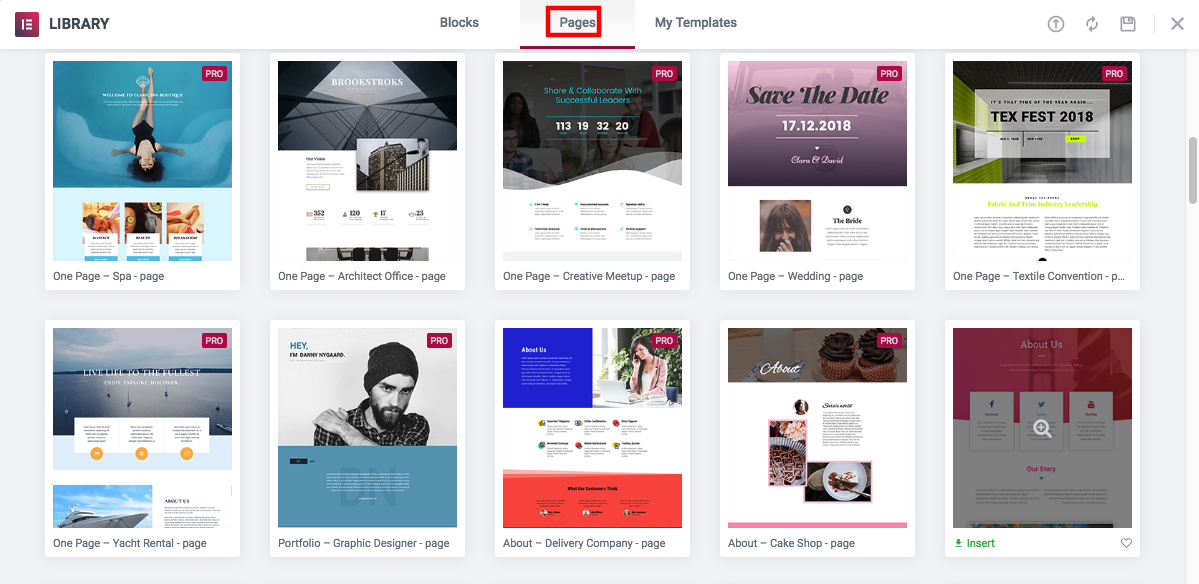
Choosing a readymade template will save you the hassle of creating a design from scratch. You can select a ready-to-use item that will only need to be modified according to your requirements. Hit the Insert link on the design that you want to use for your layout.
5. Modify The Layout
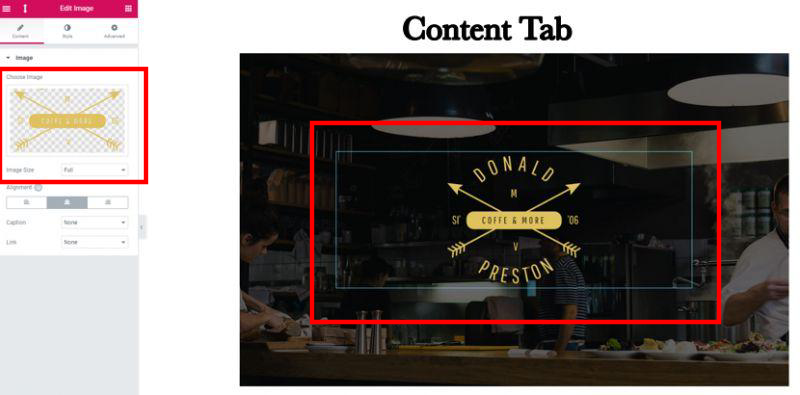
Selecting a template will load it in the editor. When you click on an element of the layout, the corresponding modification settings will be displayed in the left-hand panel.
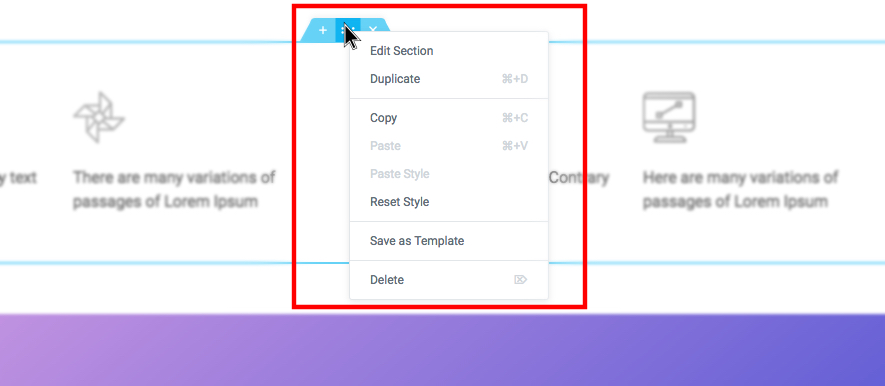
In order to use Elementor, you will have to understand the hierarchy of sections, columns, and widgets. Sections are similar to blocks and you can add them to your layout. All sections are composed of multiple columns each of which house widgets. You will Section handles on all the elements. You can click on it to define the column structure.

Right-clicking the handle will help you access more options that can be used to edit or delete the section.
Hover the cursor over the corner of the section to view the column handle. You can either drag the mouse to define the column width or use the options in the control panel on the left to achieve the same result.
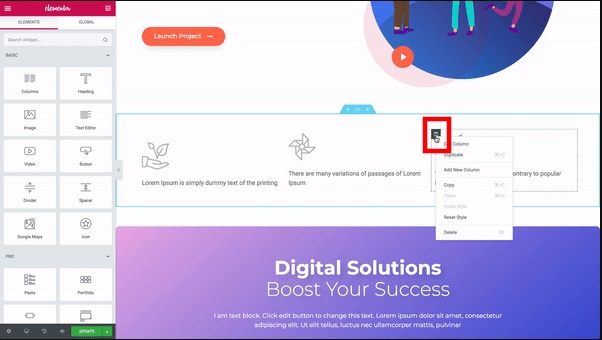
You can add a widget to a column by simply dragging the item and dropping it at the desired location.
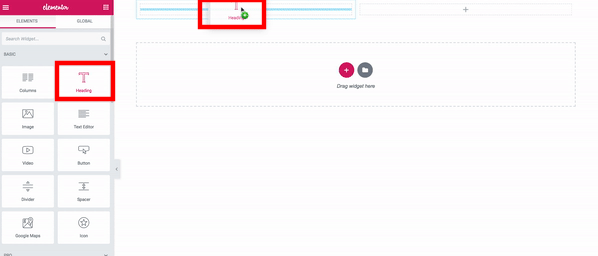
This way you can add sliders, images, headings, galleries and numerous other elements to your layout.
6. Save And Publish Your Template
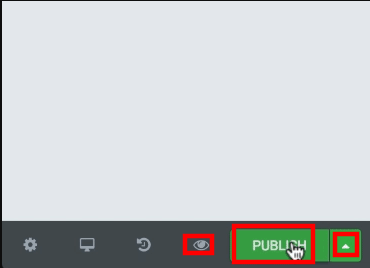
Once you are satisfied with your changes, you can click the eye icon to preview the layout. Then you can hit the Publish button to make your page go live.
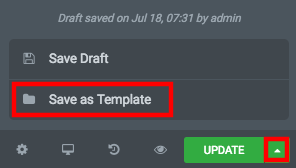
You can also save your custom template for using it again in the future. Simply click the arrow next to the Publish/Update button and choose the “Save as Template” option.
Conclusion
You can now easily generate a custom layout with the powerful Elementor page builder plugin. However, the vast range of features in the tool can overwhelm some people. Such users can contact WordPress theme customization experts at HireWPGeeks. The professionals will help them get the desired look with all the requisite features. Raise an inquiry through the contact form, e-mail or listed phone number to get in touch with the experts now.