Our Blog
How to Convert HTML Theme to WordPress Theme
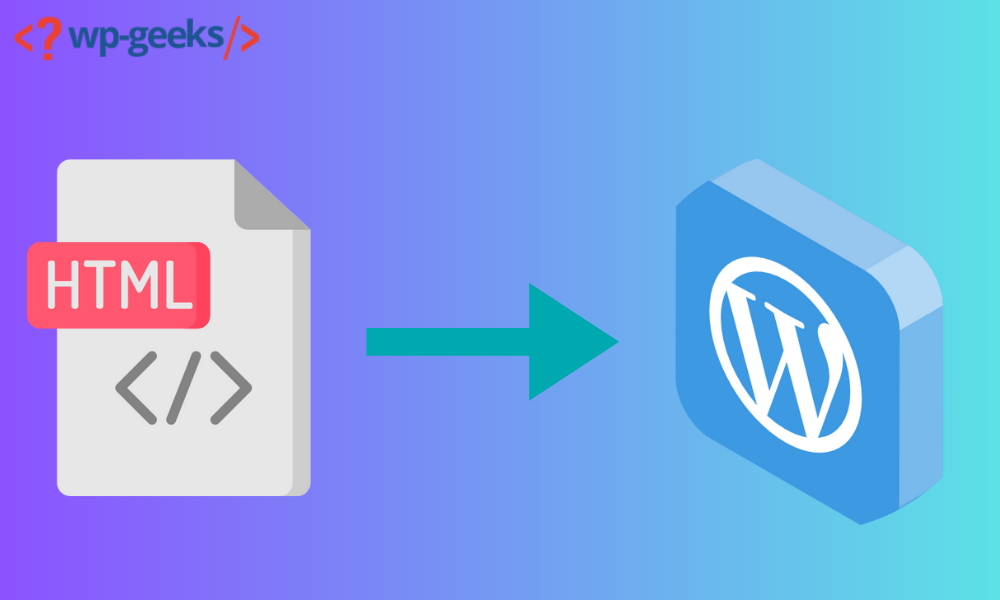
User-friendly platforms like WordPress have radically altered the publishing landscape. A high-performance, professionally-designed website can now be created without writing any code. This was only sometimes the case, though. Web pages used to be built almost exclusively with HTML, occasionally supplemented with JavaScript and CSS, before the rise of content management systems like WordPress. If you run a website, you might want to think about convert html theme to wordpress.
The bright side is that you won’t be making any fundamental changes. A WordPress website can be created from your old HTML code. There are three different approaches shown here.
Is there a way to transform an HTML template into a WordPress theme?
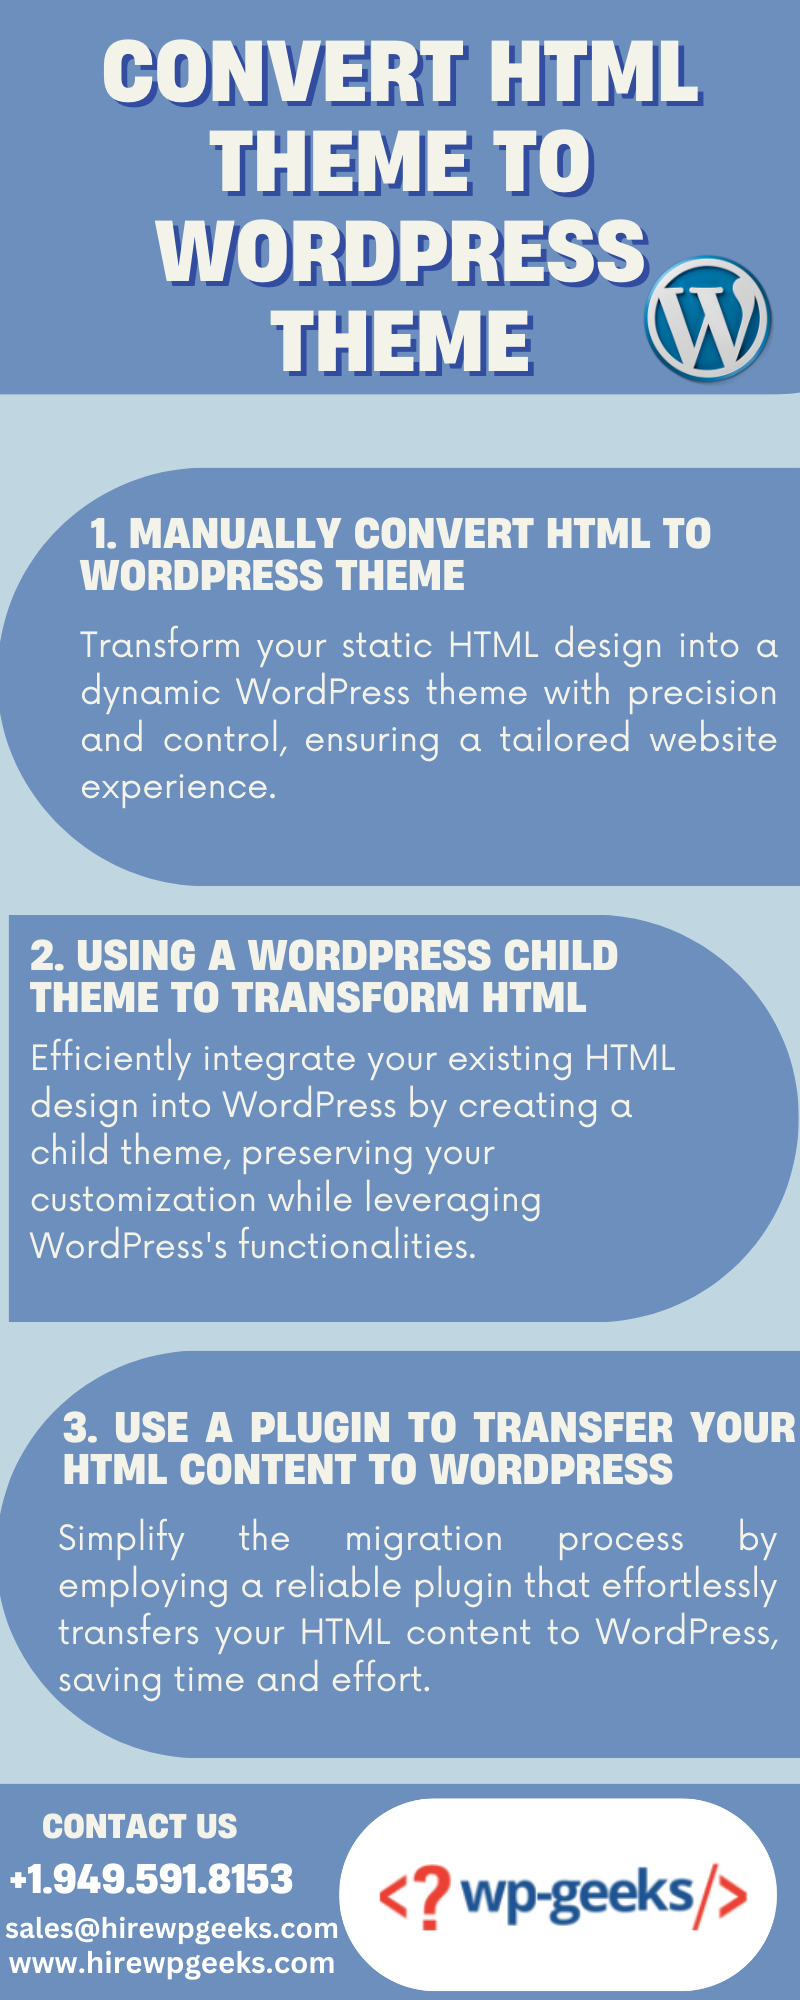
These are the three most common approaches to convert html theme to wordpress.
1. Manually Convert Html To WordPress Theme
According to experts, manual conversion is the most technically advanced method. This is why it’s only recommended for some, and if you do decide to go this route, you should have some coding experience under your belt. You should know the basics of web development languages like HTML, CSS, PHP, etc. It is the basic method of convert html theme to wordpress.
Your site’s current HTML code will be the basis for the manual conversion.
Here is a detailed tutorial on how to manually convert html to wordpress theme:
Create a new theme folder
To begin, make a new theme folder on your computer’s desktop, which functions similarly to a directory folder. It accomplishes the same thing.
The next step is to open a text editor and begin writing code. You’ll need to make five distinct documents:
- Style.css
- Index.php
- Header.php
- Sidebar.php
- Footer.php
Copy CSS Code
First, create a new style sheet in WordPress and paste all of the CSS code from the website you want to update.
First, ensure the style.css file you created in the previous step is ready for use as the WordPress style sheet.
Simply cut and paste the current site’s CSS code into your style sheet.
Enter the appropriate information to complete the style sheet header for your new WordPress theme.
That would be:
- Theme Name – Whatever you want to name it
- Theme URL – The site address
- Author – Your name
- Author URL – Link to the homepage that’s being built
- Description – A brief description of the theme that is present in the WordPress backend (this part is optional)
- Version – Start with 1.0.
- License, License URL, Tags – if you submit the theme into the WordPress directory for others to use, then only this part comes into play.
Once you’ve finished with the header, close the new theme folder and copy the existing CSS from your static HTML website.
Split up the present HTML
WordPress frequently utilises PHP to retrieve data from databases. Therefore, you must split your HTML into several parts so the CMS can properly bind them. Although it appears complex, all that needs to be done is to cut and paste specific sections of the original HTML document into separate PHP files.
The index.html file should now be opened.
Cut and paste the following lines of code from the WordPress source files:
- php – Anything from the beginning of your HTML code to the main content area falls under this category. You’ll have to copy and paste right before this designated section
- php – This is where you’ll paste all of the code from the portion marked as
- php – This section runs from the bottom of the sidebar to the end of the file. It must be invoked before closing the bracket.
When finished, you can close the “index.html” file and save the rest of your information to the theme folder.
You can close everything except for header.php and index.php.
Modify WordPress’ Header.php and Index.php Files
Now you must adapt header.php and index.php to work with WordPress.
To accomplish this, click the link and look for a section like this one.
<link rel=” stylesheet” href=” style.css”>.
Replace that link with this link:
<link rel=” stylesheet” href=” <?php echo get_template_directory_uri ();?>/style.css” type=”text/css” media=”all” />.
The next step is to save and close the header.php file.
The index.php file must be opened. As of right now, it is empty.
Fill in the blanks as follows:
<?php get_header ();?>
<?php get_sidebar(); ?>
<?php get_footer(); ?>
Make sure to separate the first and second lines of code with a blank line. Copy and paste your Loop code there.
Now is the time to save your changes and exit the file.Get the foundational theme ready, and install it on a WordPress site.
Screenshot and Upload
Finally, please upload a screenshot of your theme at approximately 880 x 660 pixels. This is a snapshot of the administrative area of WordPress. It will simulate your site for the user. Create a screenshot.png and place it in your theme’s root directory.
The WordPress theme must now be uploaded. Here’s what you need to do:
- Create a zip file.
- Go to WordPress, select appearance and themes, and click add new at the top.
- Choose “Upload Theme” and then “Upload Zip File.”
- Click Install Now.
Now, activate the theme.
2. Using A WordPress Child Theme To Transform Html
This one is much less complicated and more economical than the previous form. It lets you use thousands of WordPress themes without changing your site’s structure or code.
Using a child theme allows us to achieve this. These child themes are built on the parent theme and do not function independently; they modify the theme to suit your specific requirements. You can. try this for convert html theme to wordpress.
Select a theme
Use the WordPress Theme selector to find a suitable design. Choose a template from their extensive catalogue so long as it is similar to your current layout.
Now, upload the theme to your WordPress site but wait to activate it.
Create a new theme folder
Remember that you made a new folder on your computer in the previous technique. The same applies to you here.
Don’t change the name of the folder; just append “-child” to the end of the parent theme’s name. Verify that the name contains no blanks.
Create a Style Sheet
This is the same action you took when making a style sheet before.
Now, add a tag called “template.” Include the name of the parent theme if using one. Because the child theme can’t function without it.
Create a Functions.php
Then, you’ll create a functions.php file and use the parent theme’s styles as a basis for the child theme.
A new file should be made and saved as functions.php. Make sure you start it off with <?php.
Now, add this code written below:
function child_theme_enqueue_styles() {
$parent_style = ‘parent-style’;
wp_enqueue_style( $parent_style, get_template_directory_uri() . ‘/style.css’ );
wp_enqueue_style( ‘child-style’,
get_stylesheet_directory_uri() . ‘/style.css’,
array( $parent_style ),
wp_get_theme()->get(‘Version’)
);
}
add_action( ‘wp_enqueue_scripts’, ‘child_theme_enqueue_styles’ );
This code lets WordPress know to go to the parent theme and use the styles listed there for the child theme.
Activate the Child Theme
Now is the time to turn on the child theme.
Start by snapping a screenshot for use in the WordPress admin area.
Make a zip file with all the required files and upload it to WordPress, just like in the previous step.
Once that’s done, you can access a layout editor that mirrors your original HTML.
3. Use A Plugin To Transfer Your Html Content To WordPress.
You can only implement this strategy if you are ready to give your website a fresh look. WordPress plugins can be easier to work with if you want a completely new design.
Here are the simple steps to convert html theme to wordpress with the help of plugins.
Set Up a New Site
Launch your brand-new site and equip it with a WordPress theme. Ensure it’s a format you like and can easily be modified before you use it. You’ll have to make some cosmetic adjustments to get the feel right for your brand.
Install the Plugin
The time has come to put in place the necessary plugin. You’ll look for and install a WordPress Plugin named HTML import 2 on your site.
After that, select Install Now to begin using it.
Upload Pages
After installing the plugin, upload your pages to the same server as WordPress.
In the “Files” section, please include the following details:
- Import Directory – This is the location where you copied your existing HTML code
- The old site URL – Enter the old URL of the site. It is largely there to serve as a redirect
- Default File – Enter your index.html
- File extensions to include – Add extensions of the files that will be imported
- Directories to exclude – Everything contained in the old site needs to be excluded that you don’t need
- Preserve file names – The plugin will, by default, use the name of the file as the new URL
Then, go to the tab labelled “content” and adjust the HTML tag that holds your site’s content.
You’ll need to get used to the following tabs:
- You’ll inform the plugin how your titles are on the HTML template.
- The custom fields tab is where you’ll enter any data that needs to be imported into custom fields.
- On the Categories and Tags tab, classify the newly imported content.
- The tools screen is where you can learn more about the extension’s features.
Save your settings, and click Import Files after you’ve gone through each tab. By this you can complete converting html to wordpress theme.
Conclusion
If using a simple HTML template, consider upgrading to a powerful CMS with tried-and-true features, such as the WordPress framework. You can save time and money on website maintenance by convert html theme to wordpress and taking advantage of pre-made WordPress themes and the intuitive WordPress Dashboard.