Our Blog
5 Quick Steps To Import HTML Content To WordPress
Many people still own static HTML websites which they would like to migrate to WordPress. A dynamic website that has an attractive layout and user-friendly features is a requirement and not a luxury. It is impossible to survive the competition without such an interface. Instead of replacing the entire interface, you can simply transfer it to another platform like WordPress. However, copying and pasting all the content manually can be a tedious and time-consuming process. The conversion can be done easily and quickly with a plugin. Read on to learn how to import HTML content to WordPress websites effortlessly.
1. Install WordPress And The HTML Import 2 Plugin
First of all, you must download the core files of WordPress on your system. Most hosting services provide the facility of installing the CMS in a single click. Follow the instructions of the hosting service you subscribe to for completing the installation. Then access the admin dashboard of your WordPress installation and go to Plugins. Search for the HTML Import 2 plugin after selecting the Add new option. This is a handy tool for people looking to convert HTML to WordPress theme. Install and activate the tool and move to the next step.
2. Configure Necessary File Settings
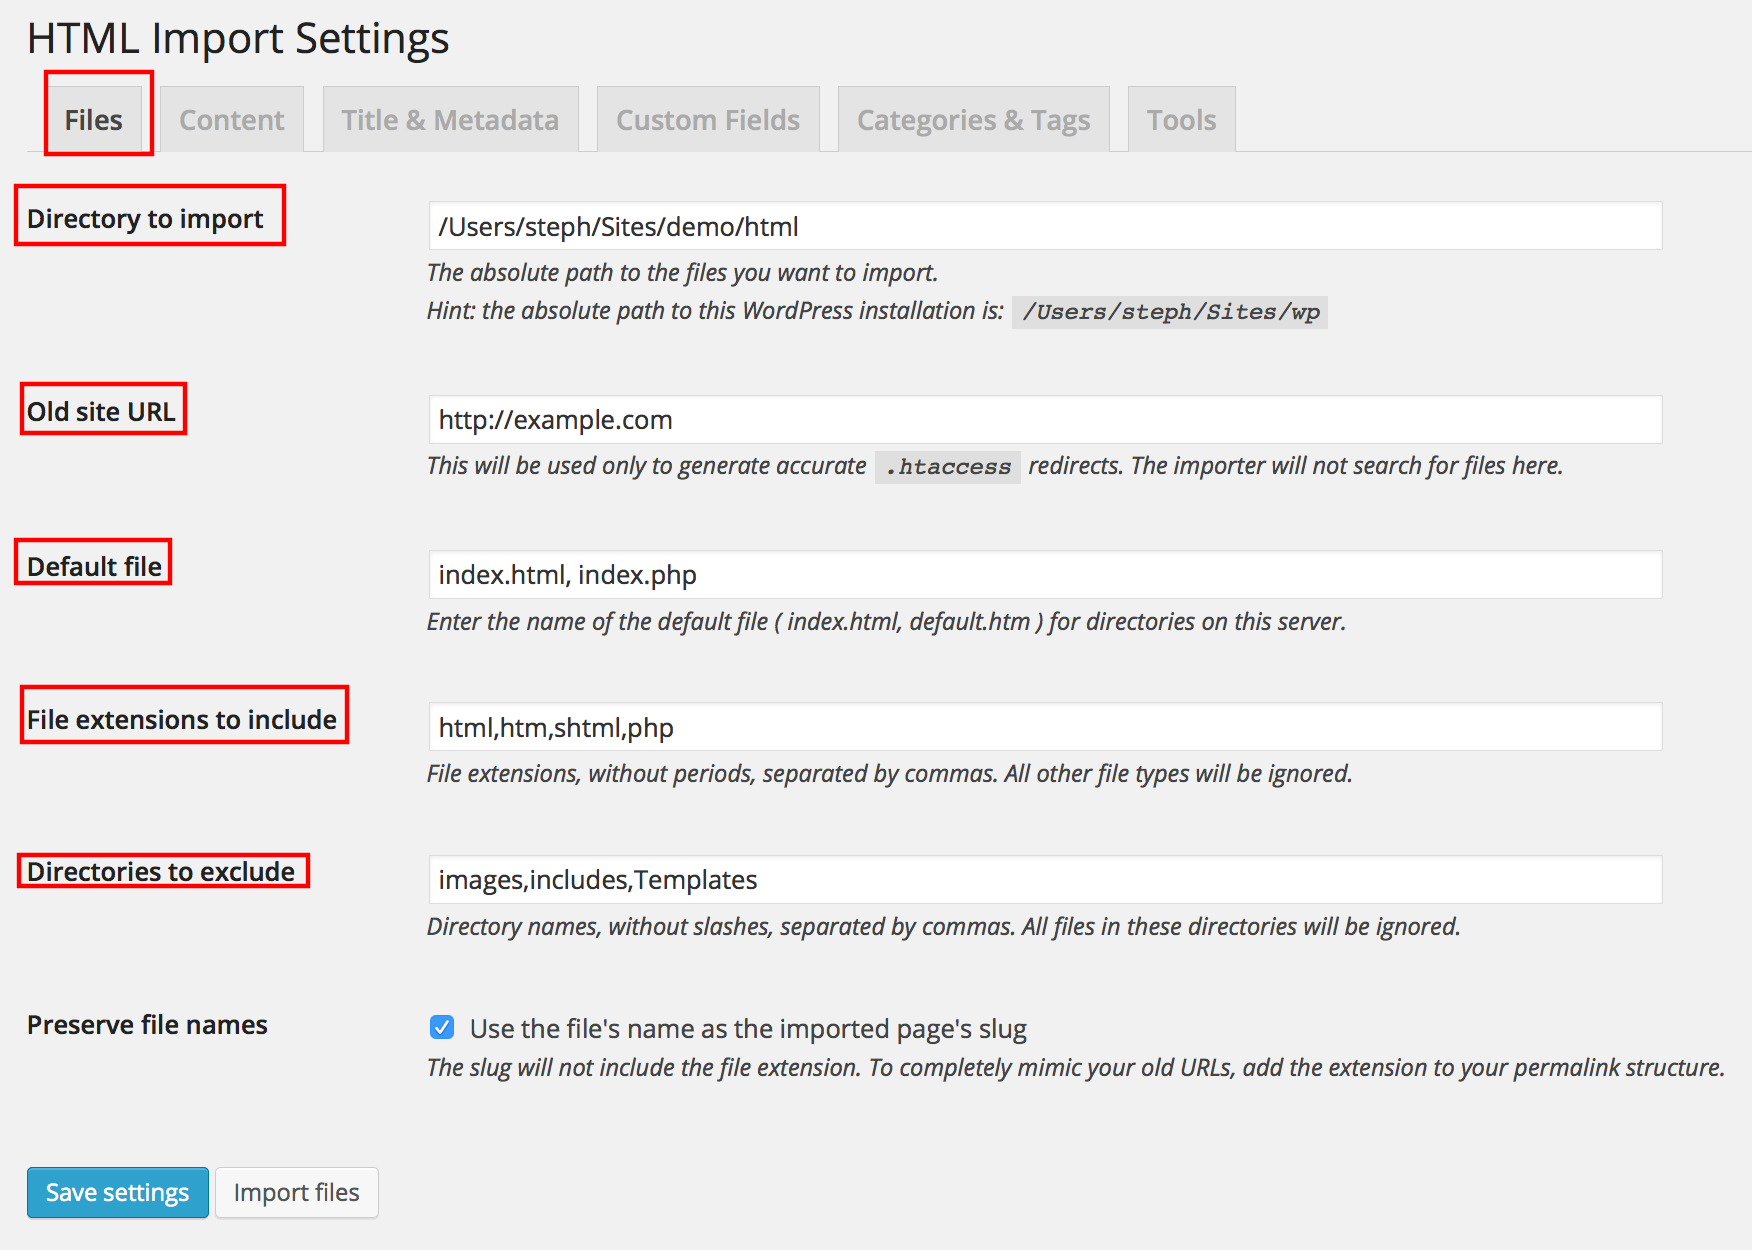
In the Settings section in the menu locate and click the HTML Import option. This will open the settings screen of the plugin. Click the first tab titled Files and make the following configurations.
i) Directory to Import: The first option directory to import requires an absolute file path. The tool will display the path from your website server. Make sure the correct directory is displayed. For instance, on Windows systems, the path will be like C:\sites\public_htmlc. Default file:
ii) Old Site URL: The importer tool needs this URL for generating accurate .htaccess redirects. This link must correspond with the beginning directory. The tool will not use this link for searching files to migrate. All those will be listed in the above option.
iii) Default File: The name of the default index files for directories must be entered in this section. Generally, index.html is used as the default file on Apache servers. In case, you want to enter multiple files, you can do it by separating the items through commas.
iv) File Extensions to Include: You must specify the file types that you want to shift to the new interface. It is, therefore, necessary to enter all file extensions separated by commas in this field. Remember not to use periods in the extensions. For instance, html, htm, shtml.
v) Directories to Exclude: Provide all the directory names that you do not want to import. All the items must be separated by commas and no slashes should be included. For example, images, includes, Templates.
3. Configure The Content Settings
In this second step of our guide to import HTML content to WordPress, we will define the content settings. Click on the tab named Content to open its settings page. In the first section, Select Content by, turn on the radio button against the HTML option. In the Tag field, enter an HTML tag without brackets. In case, you are using a tag without attributes, you must not enter anything in the attribute and value fields. You can also choose to migrate the associated images to the Media Library. This can be done by ticking the Import linked images box in the More content options. There is also the option for transferring documents like PDF and Word files. You can specify the file types in the Allowed file types field.

4. Configure The Title And Metadata Settings
Select the Titel & Metadata tab to open its settings screen. Here, you can choose the title tag in the same way as described in the previous step. Depending on the WordPress theme you select, the site title will be automatically added to all posts and pages. In case, it is included in the HTML files’ <title> tags, then it will have to be removed now. This is necessary for avoiding duplication.
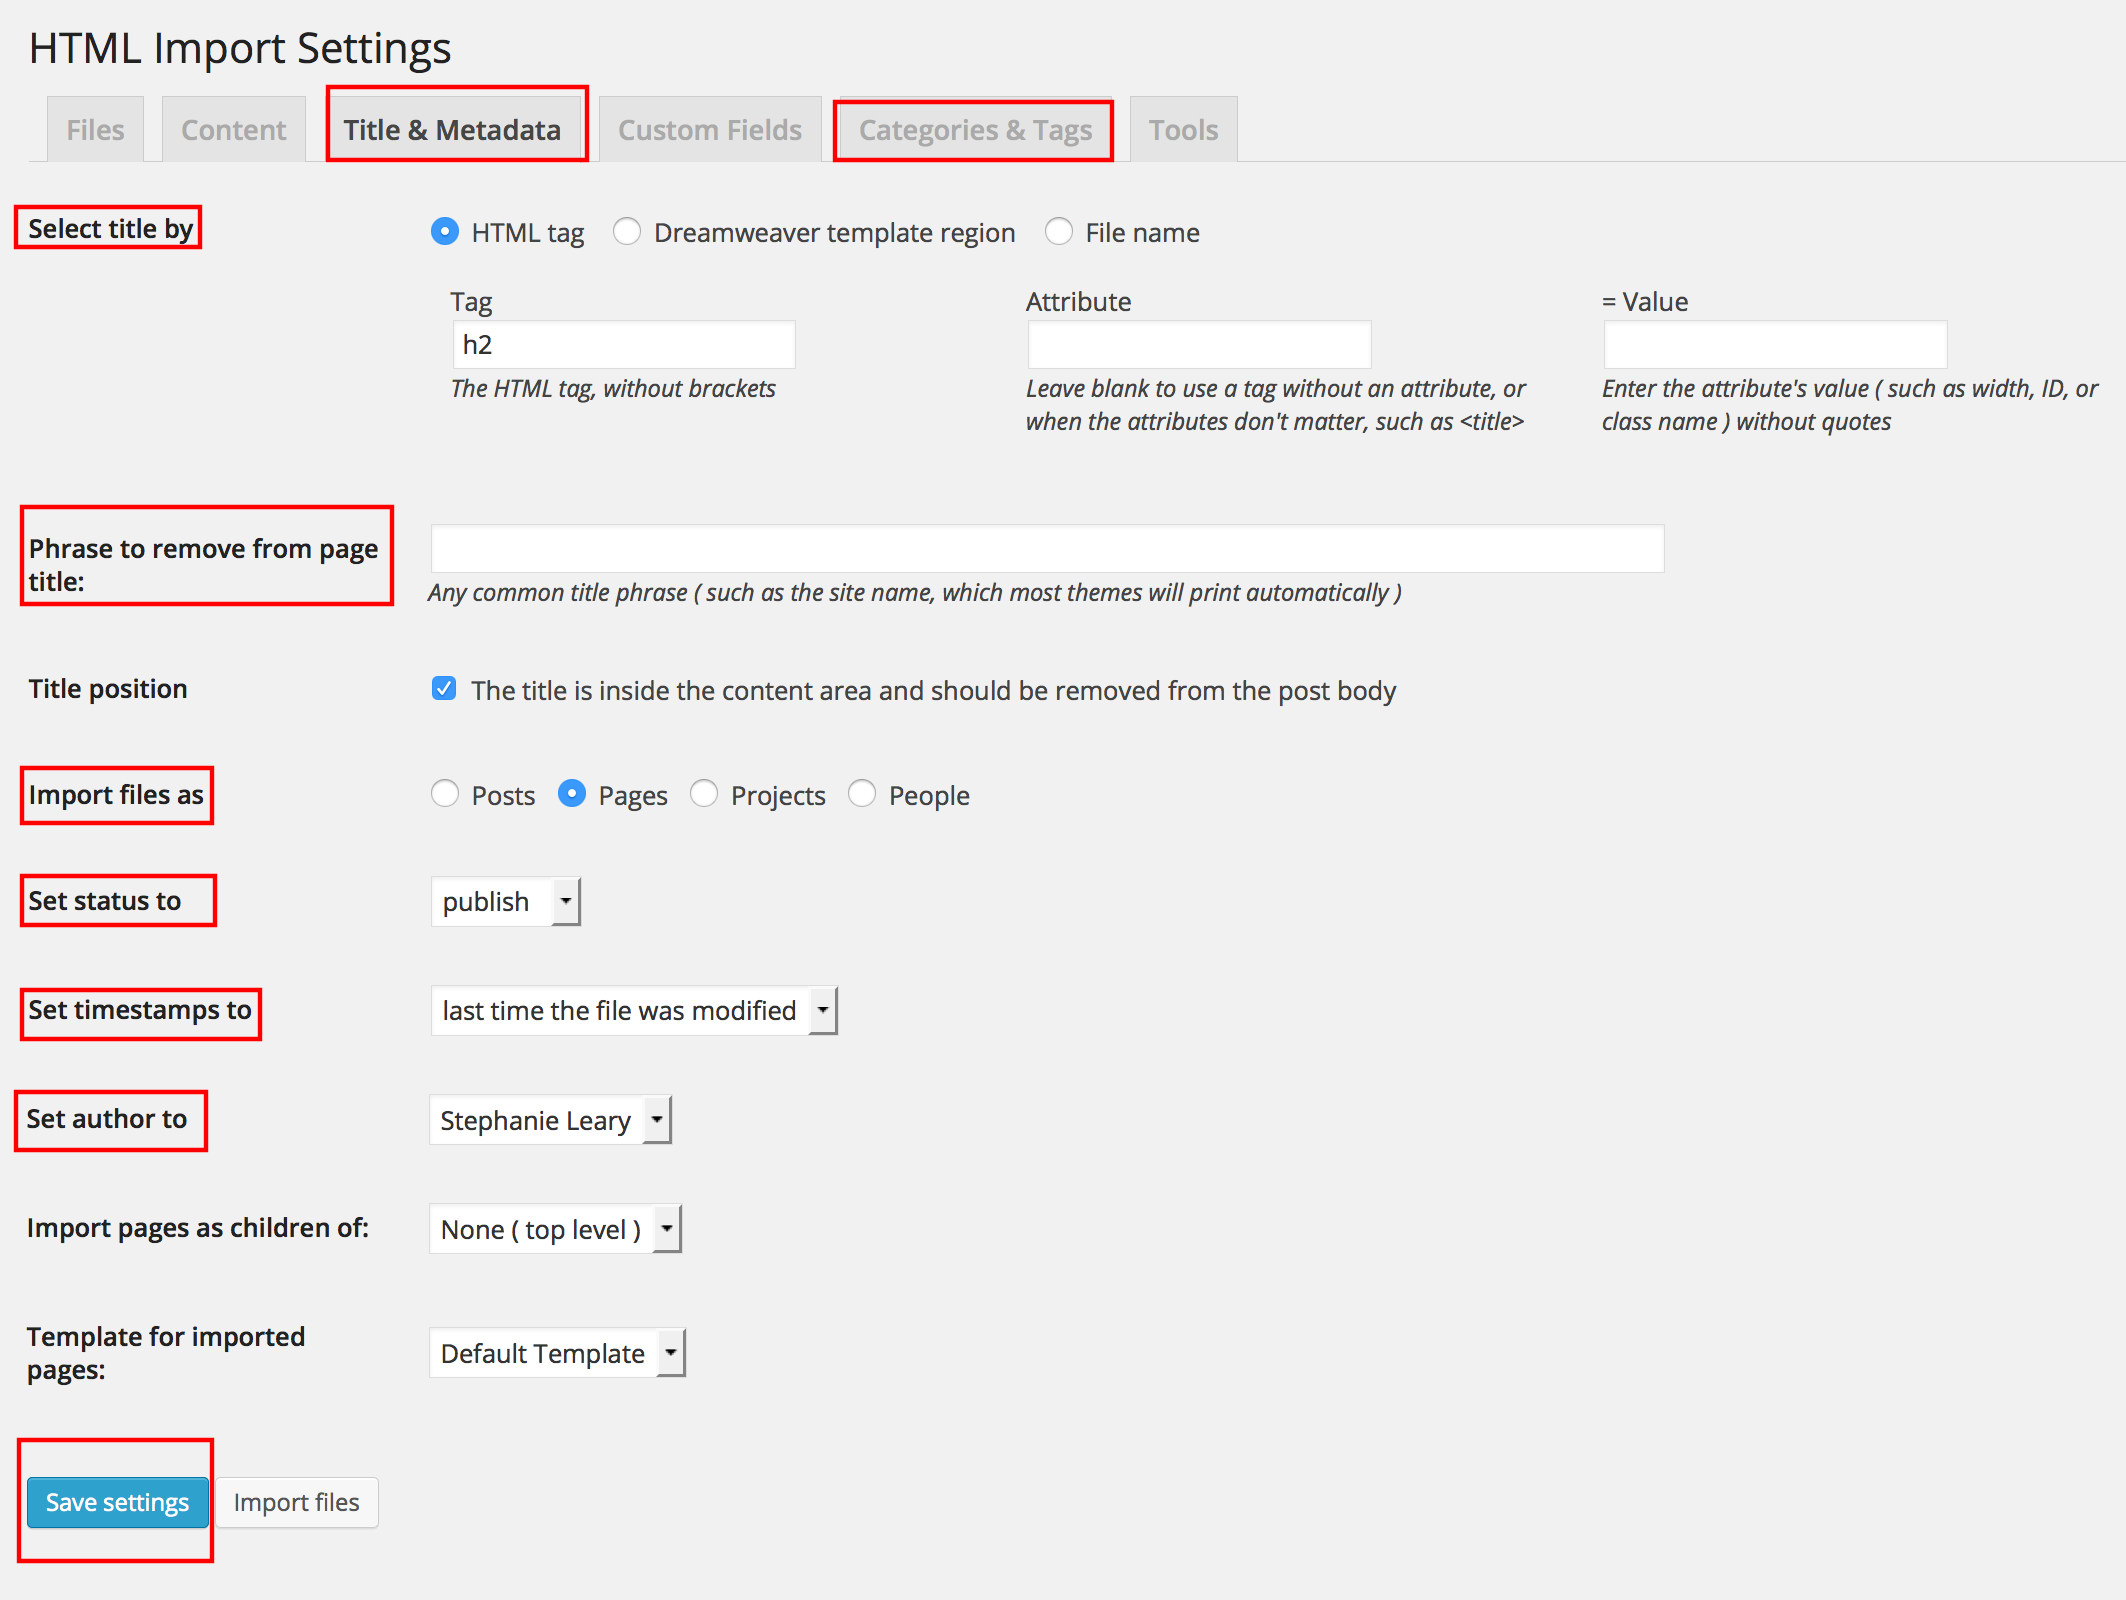
You will also need to define the metadata settings in this section. Choose the manner in which you want the files to be imported. Define status, timestamps, and authors. You can also assign categories and tags to the migrated files by accessing the Categories & Tags tab.
5. Import The Files
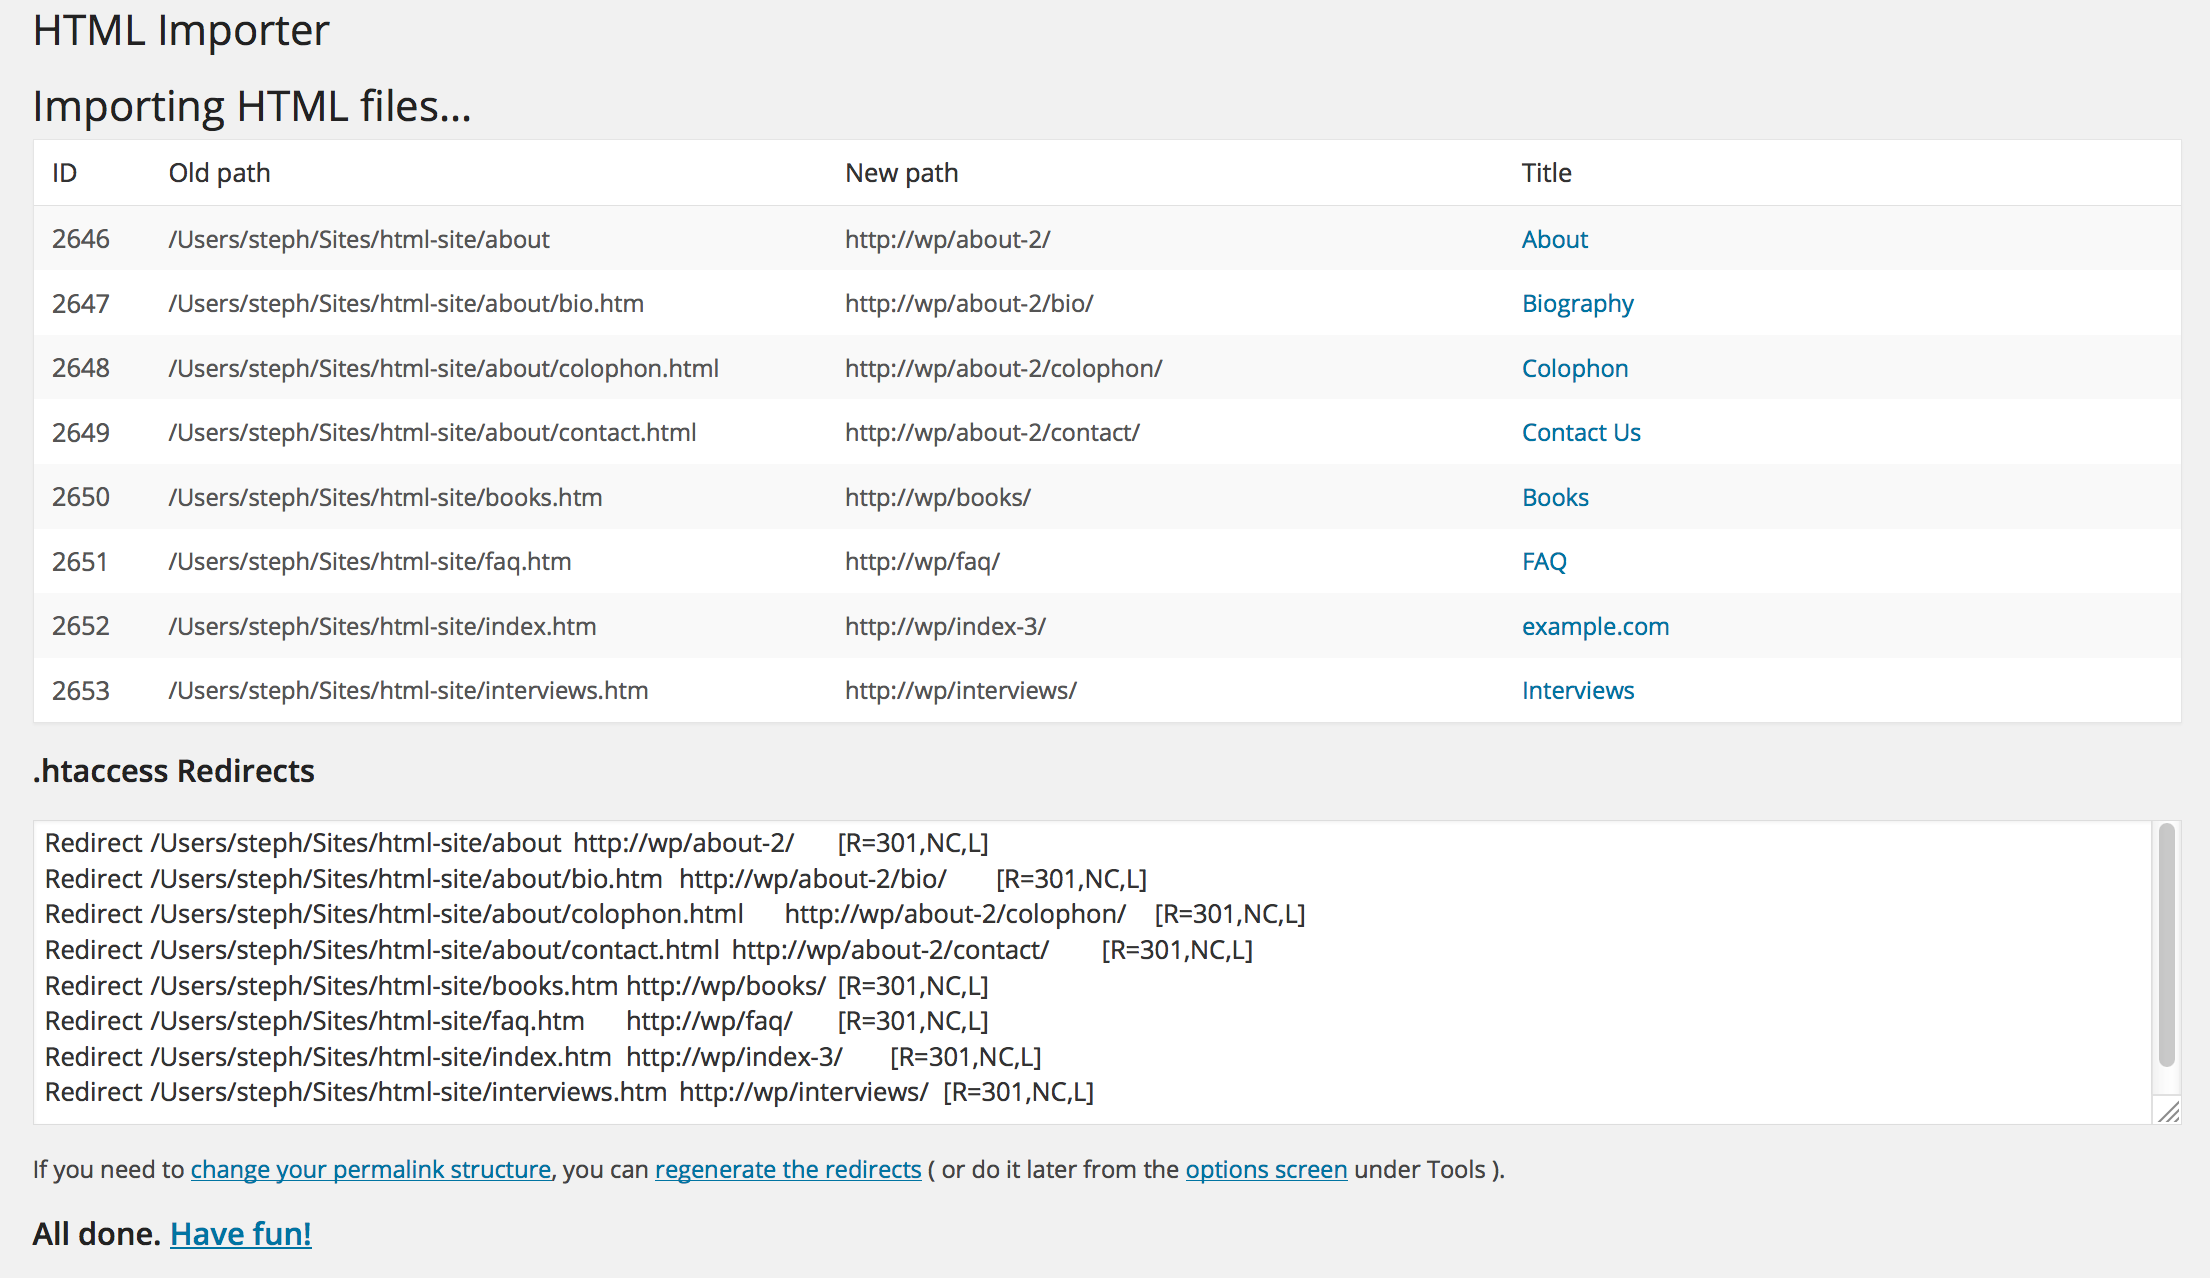
Save all the settings by clicking the blue button at the bottom of the screen. Then press the Import Files tab to start the process.

Once the migration is complete, a status report with any errors will be displayed. Make the relevant changes and complete the importing procedure.
Conclusion
This is a simple process to import HTML content to WordPress websites through a plugin. It is not difficult method but some people may still not be feeling to conduct the procedure by themselves. Such users must contact HireWPGeeks by filling the website form, calling the phone number or dropping an e-mail. The leading WordPress web development services company will provide them with migration specialists who have immense experience in converting all types of HTML websites to WordPress.